Hyundai Santa Fe One Touch Open Sunroof Modification
Installer:
Roland
Testers:
Roland
Part supplier:
DEI (Directed Electronics
Inc,) California
Author, Images:
nsdy2K, twospirits, HMA
Introduction
/ History
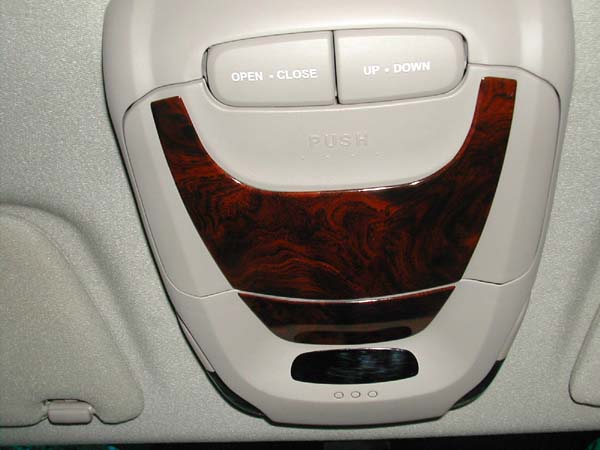
Hyundai
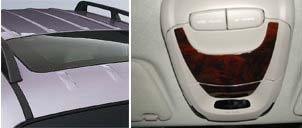
sells some Santa Fe's with a sunroof option. These sunroofs can be operated
with the supplied two switches. Each switch has an open and closed
capability. The one on the left is used to open
and close the sunroof. The one on the right will tilt it open and close. To
open the sunroof normally, you must hold down the open button until the
sunroof is fully opened. At times this is very aggravating because you can't
tell if the sunroof is fully open. Typically, as you are holding the open
button switch down; you need to take your eyes off the road to see if the
sunroof is fully opened. This
modification allows you to open and close the sunroof automatically with one
touch.
Feature:
This one touch feature works on both buttons - pressing the left open button for
1-2 seconds will pulse the D528T relay and allows the sunroof to open
completely. Pressing the right open button will tilt open the sunroof as normal
and pressing it quickly will close it again and holding it a second longer will
allow the D528T to take over and open it completely.
Limitations:
Once pressed the sunroof will open completely, you cannot stop it until it's
fully opened. If you want it to open partially, you must allow it to complete
its opening then press the close button to where you want it. The Santa Fe's
sunroof is very quick so this is done in seconds.
Optional feature:
If you want the open switch to perform a full open with two presses and one
press to do manual open then a pulse timer relay with programmable feature
should be used. This circuit design allows for that and only a different relay
replacement is required. I think one of the PAC TRC relay might be able to do
this, I have to verify the specs. I used the popular DEI D528T because it was
cheaper, available, and proven.
The module can be bought at any online electronic store, one of which is
Dr. Detail
Shop.
It retails for approx. $29.99 US Dollars.
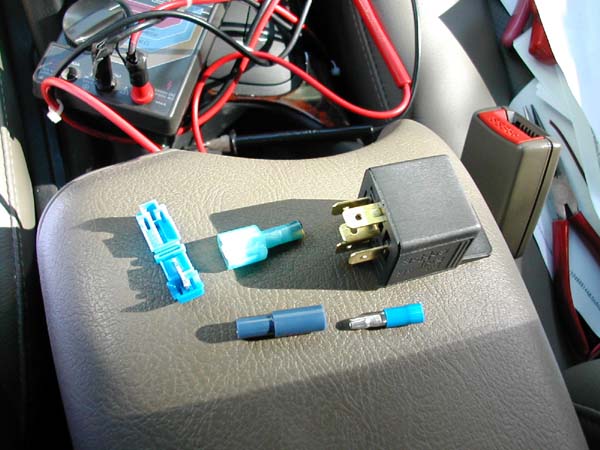
(1)
Standard SPDT relay w/
harness
See pic
03
(3)
Wire taps w/
spade connectors
See pic
03
(3)
Bullet quick
disconnect connectors
See pic
03
(1)
10mm socket
w.extension
(not
pictured)
(1)
optional
flathead screwdriver
(not
pictured)
Pic 01
Pic 02
Pic 03
The box it came in.
Outside of the box
Time to install item:
Total time for mod:
2-3 hours
Necessary
pre-mod / install steps.
1-
Close the
sunroof (see Pic 04)
2-
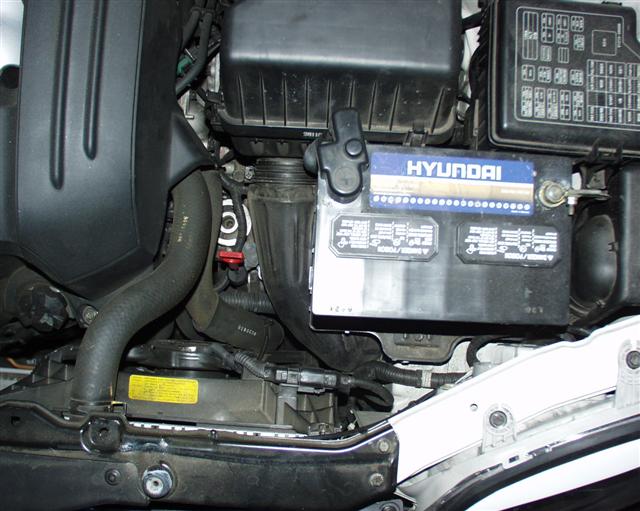
Disconnect the
negative battery terminal (see Pic 05)
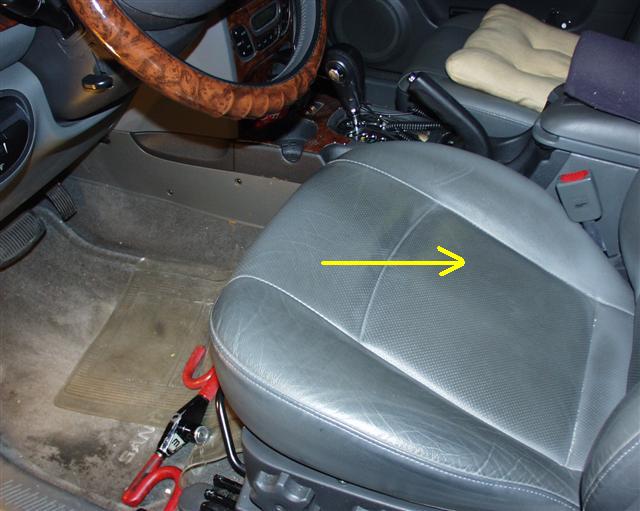
3-
Place drivers
seat back (see Pic 06) give yourself enough room to work on the overhead
console.
Pic 04
Pic 05
Pic 06
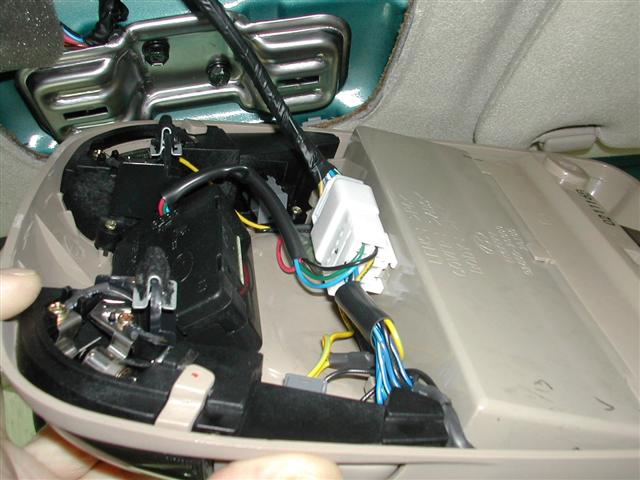
Removing the
necessary panel covers.
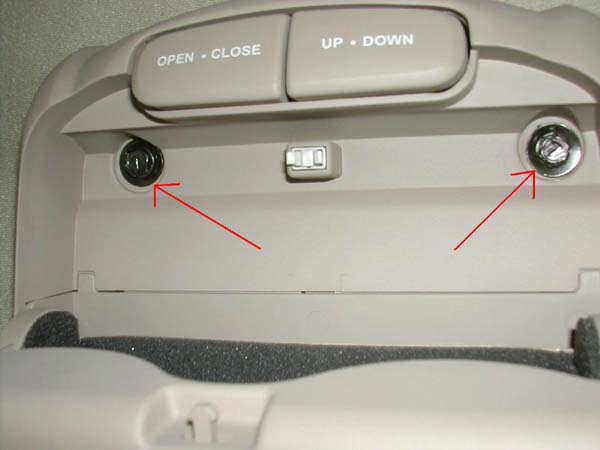
Pic 07
To remove the
overhead console assembly, press the eyeglass compartment door to open.
There you will then see two bolts on top. (see Pic 07)
Begin
removing the two bolts inside the eyeglass compartment with a 10MM socket
with extension.
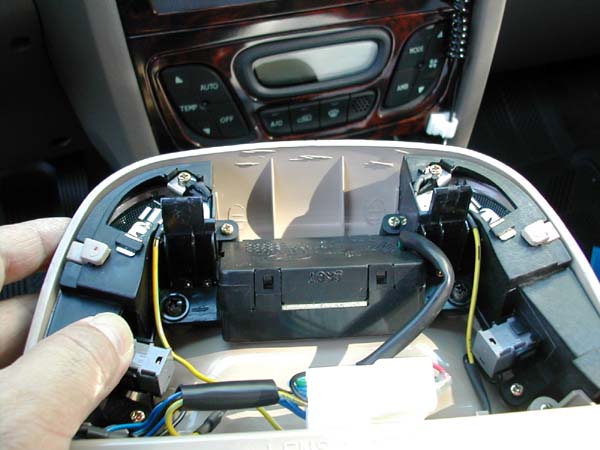
After removing the bolts, the overhead console will drop slightly. Gently
but firmly, grasping the front & side of the overhead console assembly; pull
straight down. Do not wiggle or twist; otherwise, you will risk breaking the
plastic (black) tabs on the console assembly.
Pic 08
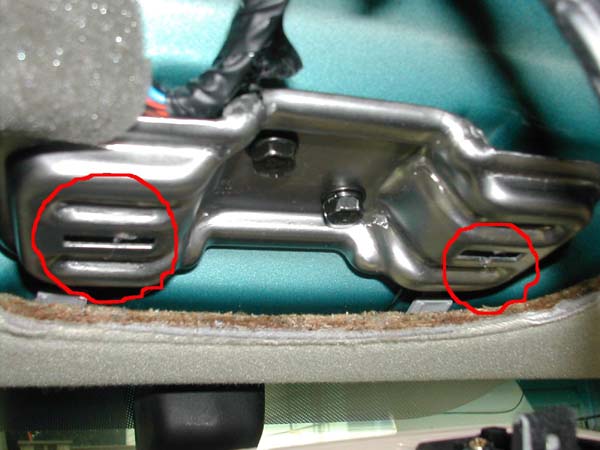
The plastic black tabs can be see in Pic 08. The
console tabs are tightly fitted because they are designed that way. The tabs
are held in place by metal clips. Inside the clips are cleat-like teeth.
Pulling it straight down will pull the clips off along with the console
assembly.
Pic 09
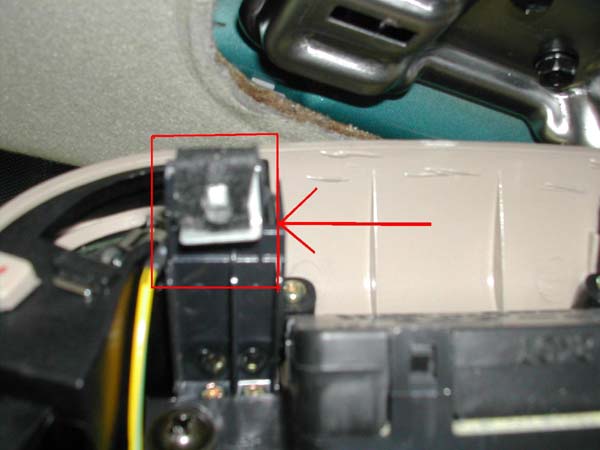
As you can see
from Pic 09, the clips came off along with the
tabs. Using a small flathead screw driver, you can
gently pry them off the plastic tab.
Pic 10
Pic 10 shows the sunroof frame with slotted
openings for the clips.
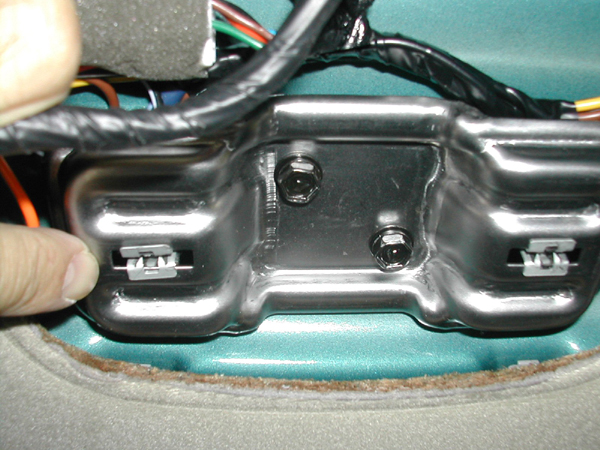
Pic 11
Re-insert the
removed clips by pushing them back into the sunroof frame as shown
in Pic 11.
Familiarizing
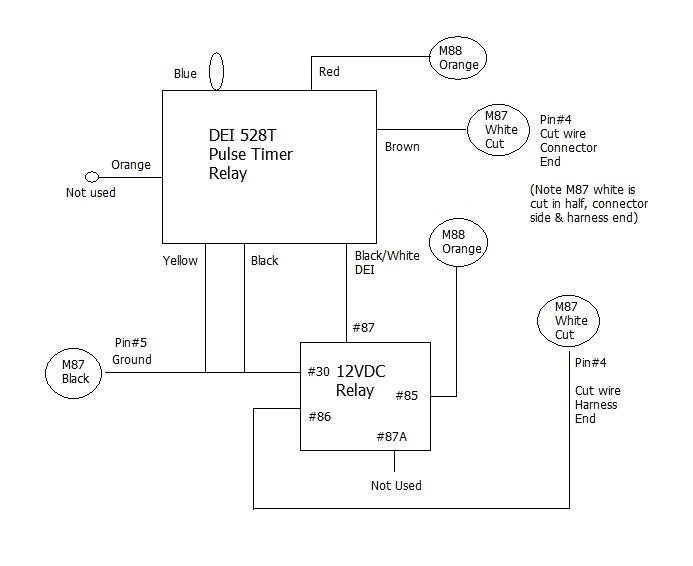
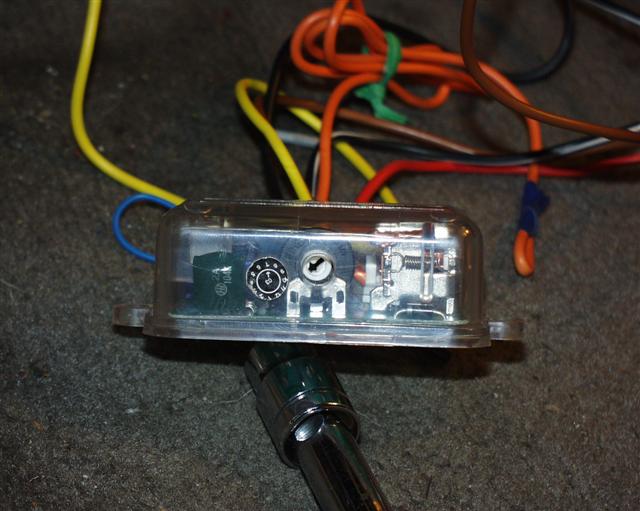
yourself with the D528T Pulse Timer module.
Pic 12
The DEI D528T Pulse Timer (see pic 12) is a adjustable timer relay
with a built in 30Amp normally closed pole. When pulsed, the relay will
throw the second pole closed and remain closed until the duration of the
pre-set timer. Having two poles allow the ability to create any
disconnect/connect circuitry for any amount of time ranging from 0-90secs.
The relay has a rotary switch for adjusting timer duration.
The module
comes with generic instructions, which are not to be followed
for this modification.
The DEI D528T connections:
Color
Description
Connects
to
Black/White
Trigger Input
#87 (SPDT)
Red
+12 V constant
M88 - Orange
Brown
Normally
opened
M87 - White (cut half connector
side)
Black
Ground
M89 - Black
Yellow
Common
M89 - Black
Orange
Normally
closed
Not Used
Blue
Trigger type
(+/-) Loop
Leave alone
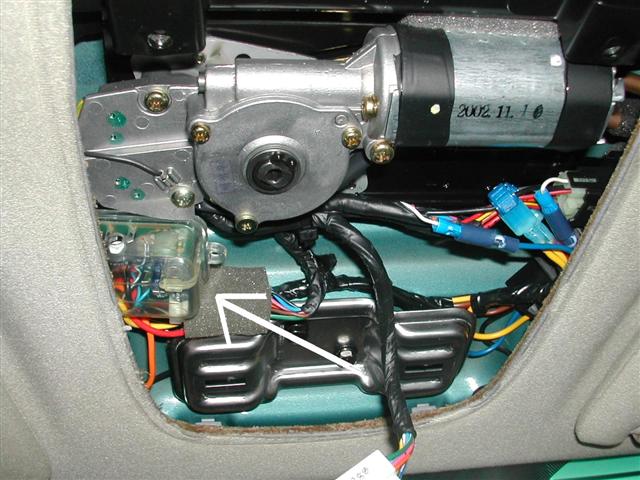
Familiarizing
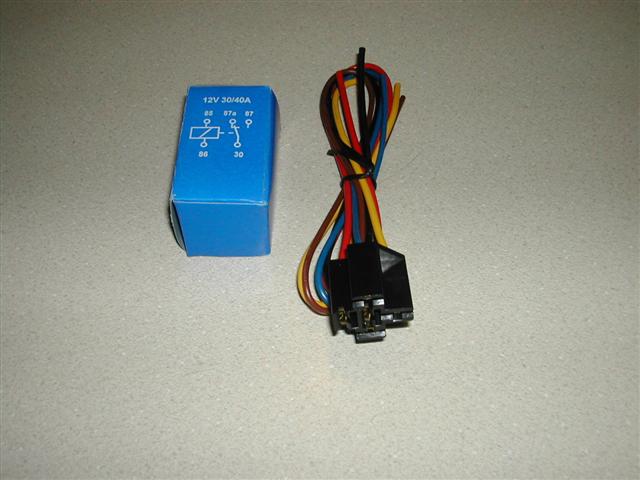
yourself with the standard car SPDT relay.
Pic 13
Pic
13 shows the standard automotive alarm +12VDC SPDT 5 terminals relay.
Usually cost $2-$5, I found mine on-line for $1.89 plus shipping. This is
the classic relay having single pole with double throw switch. When the coil
is at rest, the common terminal #30 and #87A are closed and have continuity.
When the coil is energized, the common terminal #30 and #87 are closed
(continuity) and #87A is opened (shorted).
The STD car relay (SCR) 5 terminals:
Description
Connects
to
#85
coil
M88 - Orange
#86
coil
M87 -
White (cut half harness side)
#30
common
M89 - Black
#87
normally
opened
DEI -
Black/White
#87A
normally
closed
Not used
Wiring Diagrams for
the Santa Fe:
(Note:
Only two connectors M87 & M88 are required for this installation).
Pic 14
Pic 14 shows the Hyundai Webtech wiring diagram for the sunroof.
(Click on the image to open up in a new window at full size)
Pic 15
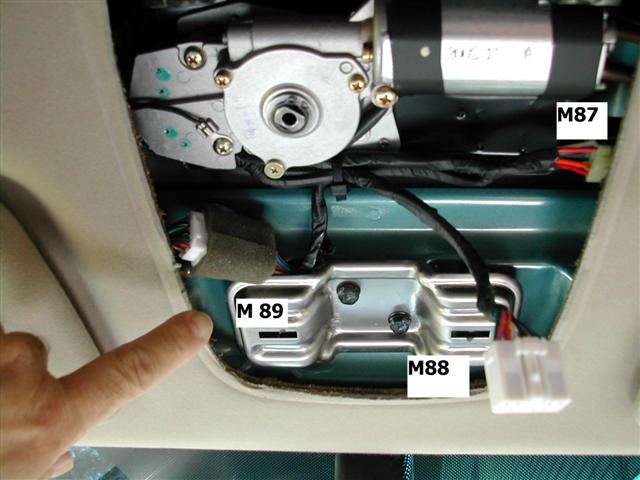
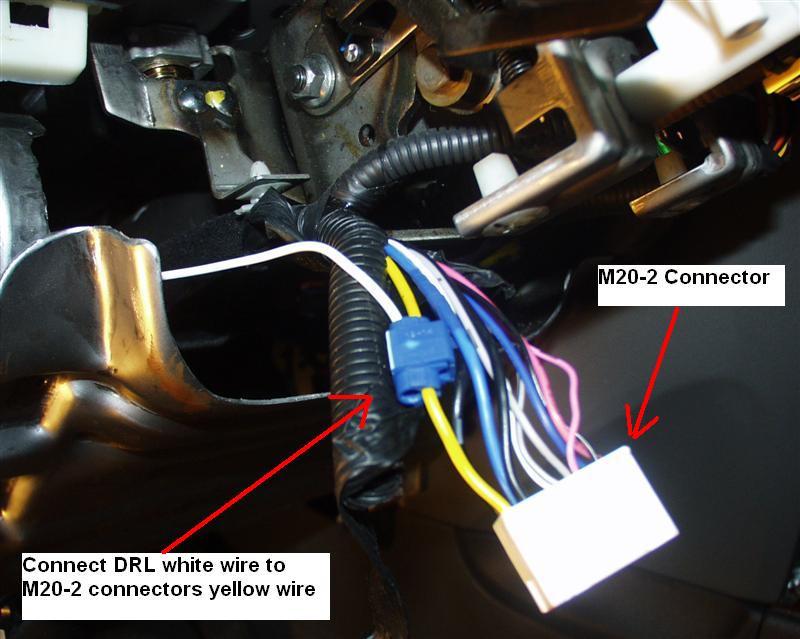
Identifying the
connectors you will be working with.
M88, M87 & M89
Connectors
Pic 16
There is one
connector (M88) inside the overhead console assembly. Remove the overhead
console by disconnecting the lamp & power connector M88.
(See Pic16)
Pic 17
With the
overhead console removed you will see and have access to two other
connectors, M87 & M89.
Pic 17 shows the following
connectors..
M87 – sunroof relay connector
M88 – overhead console lamp & power connector
M89 – sunroof motor connector
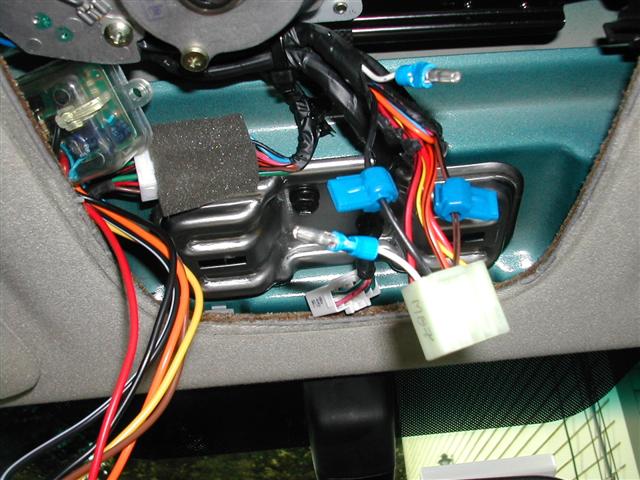
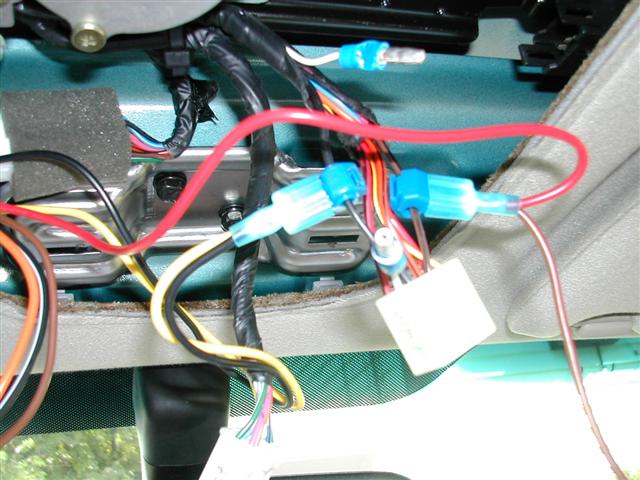
Begin wiring...
Pic 18
Unwrap the electrical tape from M88 connector and wire tap M88 Orange wire.
Pic 19
Detach the M87 connector and unwrap the
electrical tape to expose the two wires, Black and White.
Install a wire tap on the Black wire at
M87. This is the ground for the circuit.
At M87, make sure the White wire is
exposed 2 or more inches. This will allow more room for stripping the wire.
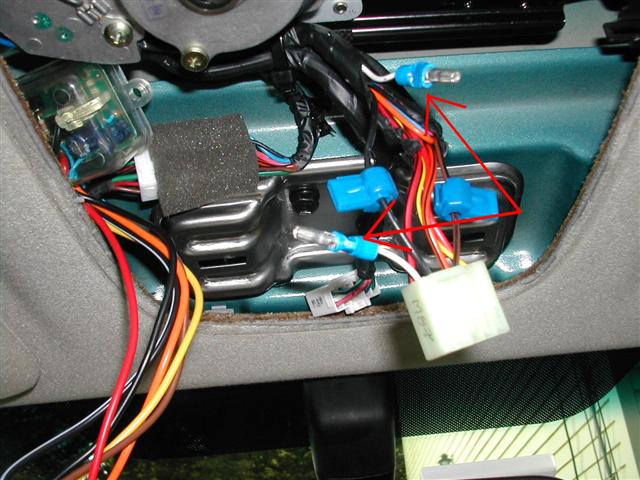
Pic 20
Now, cut the White wire in half,
separate, and install male bullet connectors on each end of the White wire.
See the arrows in the photo.
(Note: If you look
carefully, you can see the D528T relay, tuck inside the headliner next to
the M89 connector on the left side of photo.)
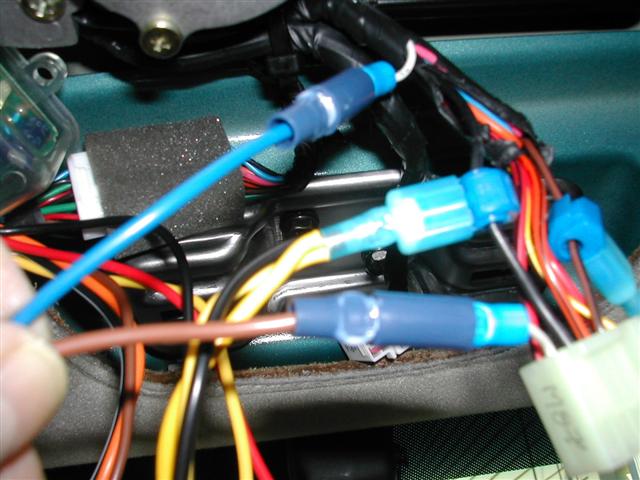
Pic 21
Connect together DEI Black & yellow with
SPDT #30 and insert into male spade connector and connect to wire tap on M87
Black.
Connect DEI Red and SPDT #85 to a male
spade connector and connect to M88 Orange.
Connect DEI Black/White to SPDT #87.
Leave alone DEI Blue cable & do not cut. Also DEI Orange cable is not used.
Pic 22
Using bullet connector, connect SPDT #86
to M87 White, the cut half on the harness side.
Connect DEI Brown to the
other M87 White, the other cut half on the connector side.
This is
how the bullet connectors look like after the connections.
Pic 23
This is the D528T pulse
timer relay. It has clear body case with a rotary adjustment switch. Insert
the relay inside the headliner.
Insert the other relay
SPDT on the opposite side next to M87 relay. Also place inside the headliner.
Pic 24
Now, tape all wires and push them neatly inside
the headliner.
Adjusting the DEI
pulse timer.
Pic 25
As mentioned
earlier, the D528T Pulse Timer has a built in adjustable rotary switch that
allows you to set the timing sequence to disconnect a circuit a certain
amount of time. You turn the switch by using a flat head
screwdriver.
Turn the DEI adjustment
dial to 8 o’clock position to start. Reattach the battery cable and plug
the M88 connector back to the overhead console assembly. Allow the console
to hang on itself.DO NOT INSERT THE CONSOLE BACK YET!
Testing the D528T
Pulse Timer.
Turn the ignition key to
accessory position. Press the sunroof open button and hold down for a second.
The sunroof should open and continue to run until the relay click off. Listen
for the DEI relay to make a weak click noise after the sunroof has stopped. If
the click comes within seconds after closing then it’s fine. If the wait is
longer than that, then you might want to adjust the DEI rotary knob slightly.
Clockwise to lengthen the pulse timer (SR opening time) and counter clockwise to
shorten
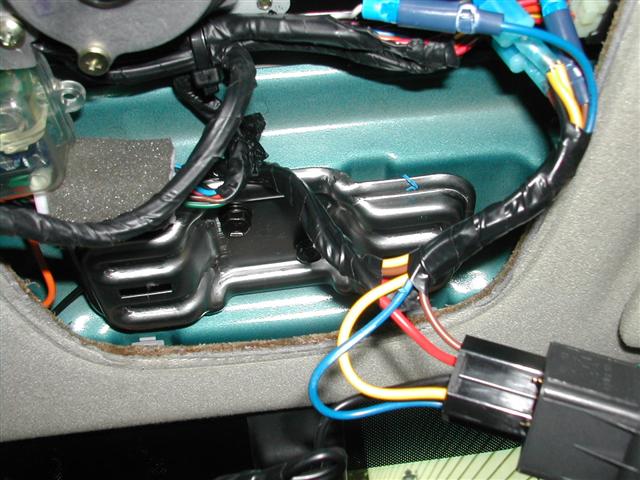
Securing the D528T
Pulse Timer.
Pic 26
At
this point, knowing that the Pulse Timer works, you can secure any loose
wires by wrapping them up in electrical tape if desired and secure the
module in a place that will keep it from knocking around.
Now
align the tabs with the clips. Push the overhead console assembly up and be
sure the tabs are inside the clips
Final wrap up.
Pic 27
Finish tightening the bolts inside the eyeglass holder and your installation
is complete.


