| |
|
|

|
|
Place the marking jig
template in the appropriate spots.
(SEE PIC # 03.)
|
| |
|
|
 |
|
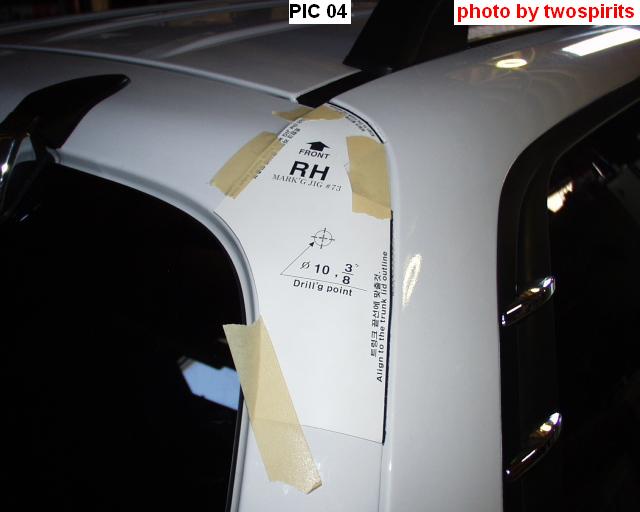
Do the same for the right
side.
(SEE PIC # 04.) |
| |
|
|
 |
|
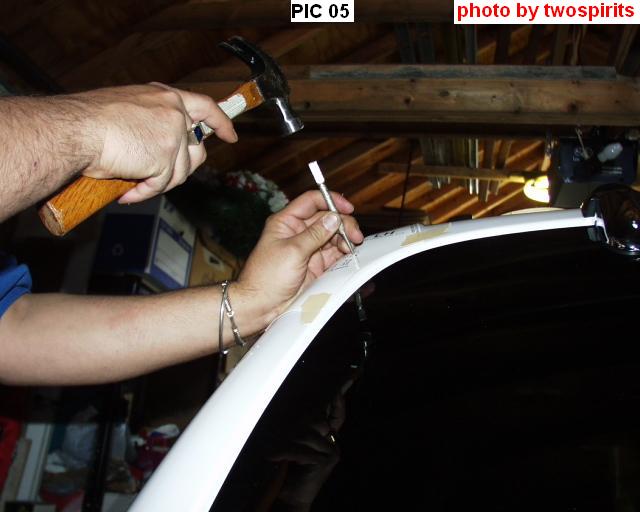
Take a center point and
with a hammer tap it 1-2 times to make a small indentation. Do the same for
the other side.
(SEE PIC # 05.) |
| |
|
|
 |
|
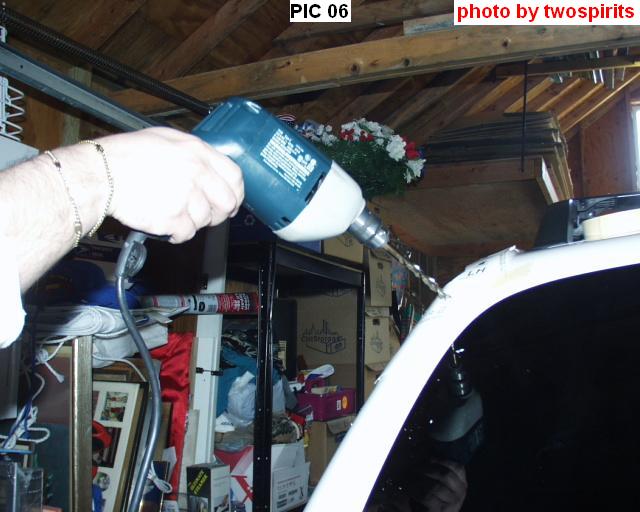
Make sure you have eye
goggles protection.
Take a 5/32 bit drill bit and drill to make a small hole at the marking
point indicated on the jig template. Do the same for the other side. This
allows the bigger drill bit to go through. Now take the 3/8 drill bit and
finish drilling through the hole.
(SEE PIC # 06.) |
| |
|
|
 |
|
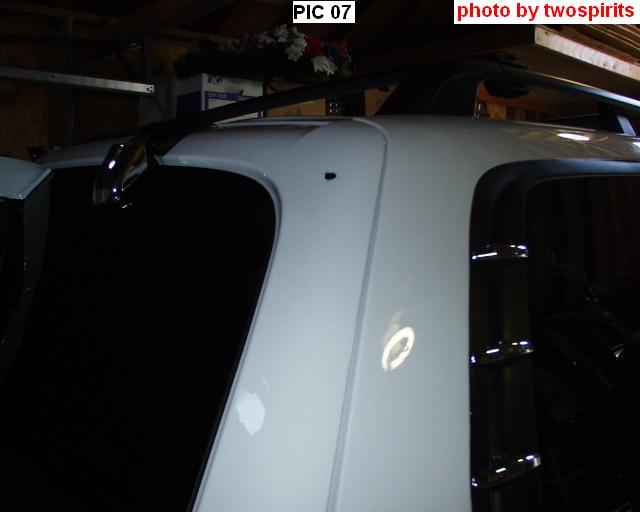
This would be the finished
hole you just drilled. (Do not take the template off, this picture is only
to show you what it would look like.)
(SEE PIC # 07.) |
| |
|
|
 |
|
The marking jig template
folds over to the underside of the hatch. It has several folding lines indentations that allow you to fold the
template over the ridges of the underside of the hatch. Make sure it is held
by masking tape.
(SEE PIC # 08.) |
| |
|
|
 |
|
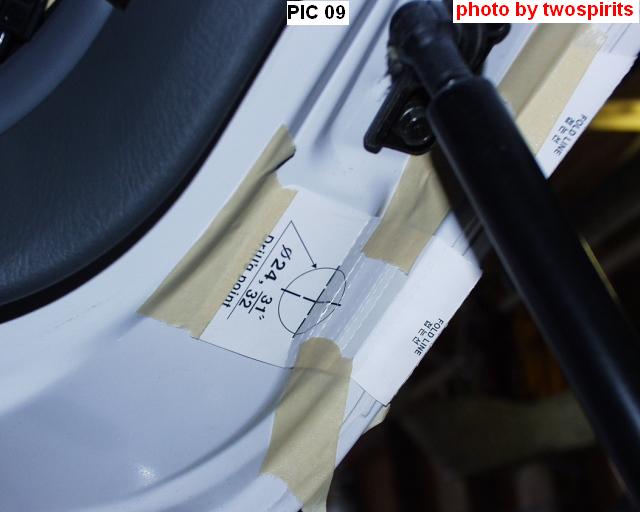
Do the same for the other
side.
(SEE PIC # 09.) |
| |
|
|
 |
|
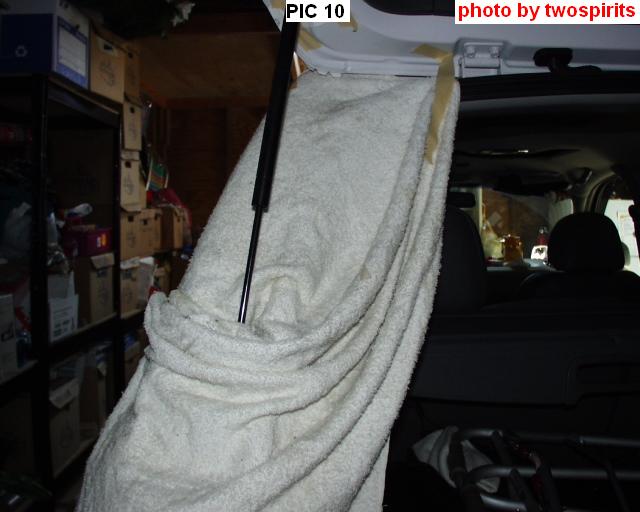
Place a towel around the
left rear pillar. This allows any drilled metal shaving to not scratch the
sides once you start drilling.
Take a center point and with the hammer tap the mark 3-4 times.
Take the 5/32 bit drill and drill a hole at the mark. It will be easy going
through the first layer, once you hit the second layer of metal stop and
change drill bits.
Change to the 29mm drill bit, (template says to use a 31/32 but I could not
find one, the 29mm is as close as it gets).
(SEE PIC # 10.) |
| |
|
|
 |
|
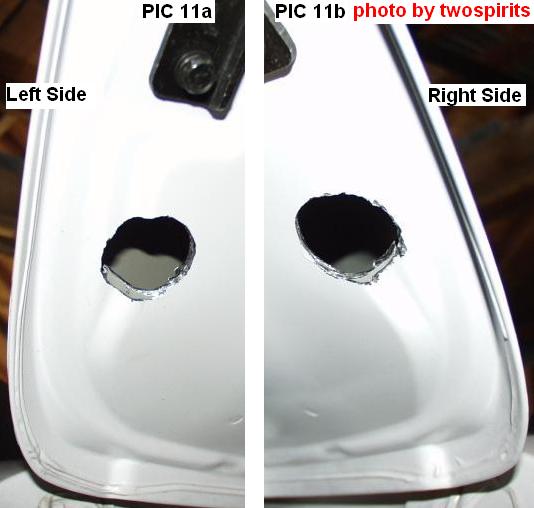
Using the 29mm drill bit ,
apply pressure to drill through the second layer. Be sure not to apply too
much force or you will hit the outer sheet layer of metal.
This is what the resulting hole should look like after you go through. Take
a sand file or dremel tool and smooth out the metal shavings so it won't be
so sharp.
(SEE PIC # 11.) |
| |
|
|
 |
|
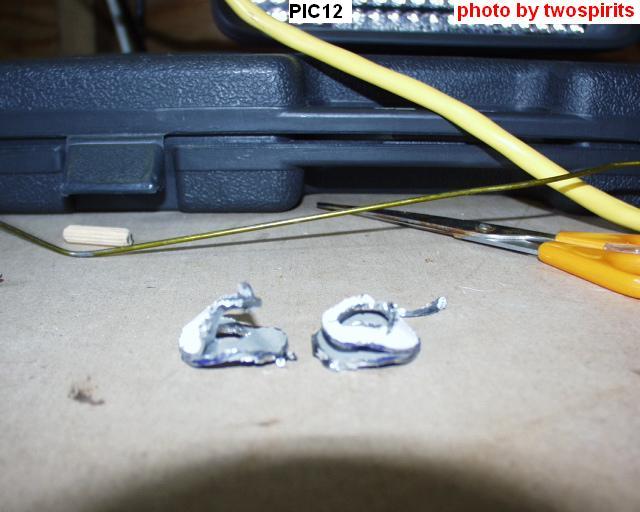
These are the hole bits
after you drilled through, it shows the two layers that you just drilled
through, and it explains why it is harder drilling the underside of the
hatch.
(SEE PIC # 12.) |
| |
|
|
 |
|
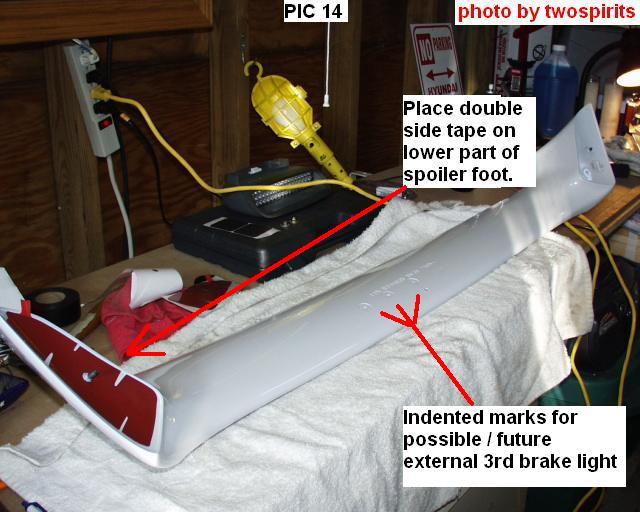
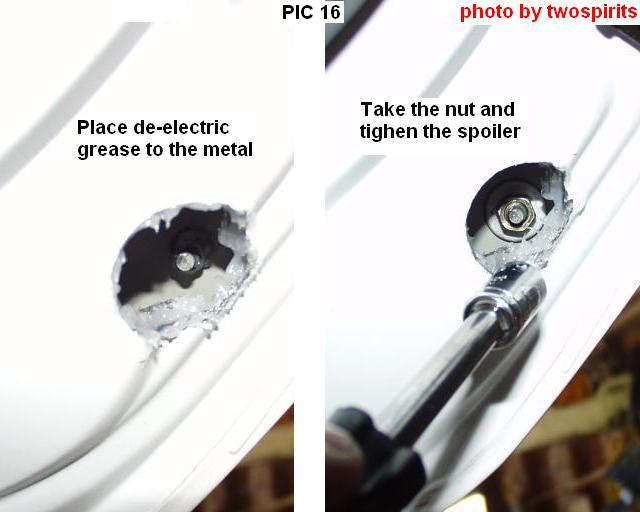
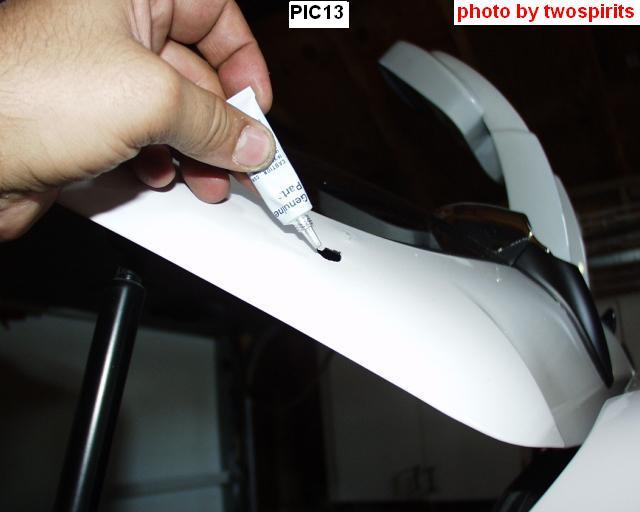
Apply the kits'
dielectric grease to the exposed metal, (both left and right upper holes).
(SEE PIC # 13.) |