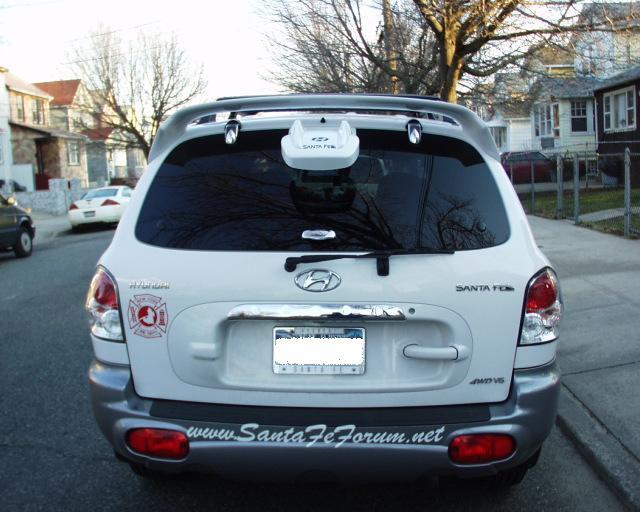
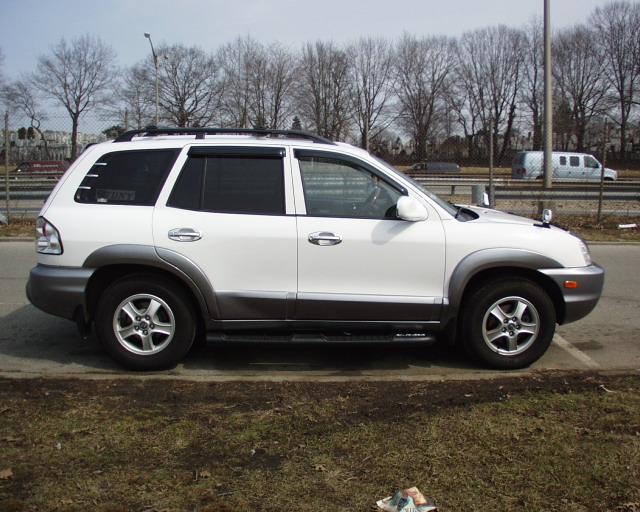
The
Santa Fe is a SUV that is not that high off the ground, but for those that
have a hard time getting in and out of one, such as the elderly, or small
children nothing beats the assistance a side step provides. Side steps make
it much more easier getting in and out of any SUV, plus it helps keep a
steady footing if you are stepping out into wet/slick ground or if off road
onto rough terrain. Most side steps are sold as a kit, which provides all
the parts necessary to fit the particular vehicle. Side steps attach
directly to the frame of the vehicle. Most do not need drilling because they
use the pre-drilled mounting holes that the manufacturer already made on the
vehicle. The step by step instructions below are for one such kit that
I bought from TFR Racing. It is a genuine Hyundai Motor
Corporation part manufactured by Hyundai Mobis. The original instruction
sheet that is supplied by the manufacturer is in Korean. This is the reason why I
created this install guide, to make it easier for others plus saving
to have someone install it for you.
The Kit was
shipped and packaged very well and all the items were accounted for.
The kit
consists of the following items...
Item
Qty
01)
Side
Step Assembly
1
Left
1
Right
02)
Bracket
Side Step
2
Left
2
Right
(Attached to the
Side Steps)
03)
Bracket
Side Step Mounting
1
Left
1
Right
(Front Set)
04)
Bracket
Side Step Mounting
1
Left
1
Right
(Rear Set)
05)
Bolt
(M8x16)
16
Pieces
(you can use a 13mm
or 1/2 socket ratchet)
06)
Bolt (M8x20)
16
Pieces
07)
Bolt (Level Type)
8
Pieces
08)
Nut (M8)
16
Pieces
(you can use a 12mm
or 15/32 socket ratchet)
09)
Nut (M10)
8
Pieces
(you can use a 17mm
or 11/16socket ratchet)
10)
Washer-Plain
8
Pieces
11)
Installation manual
1
Item
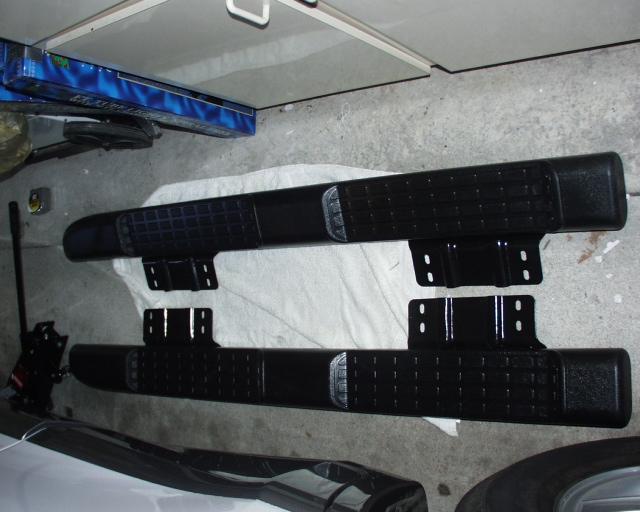
Side Steps out of the box (SEE PIC # 01.)
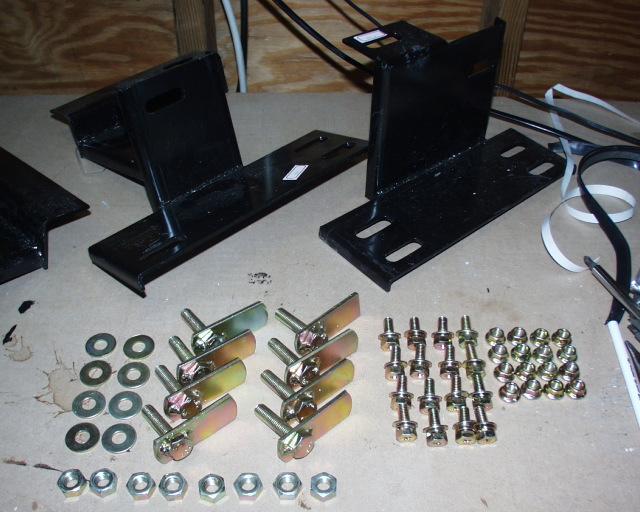
Kit parts (nuts and bolts) (SEE PIC # 02.)
Kit Brackets (SEE PIC # 03.)
Main tools
TFR Racing Side Step Kit SFE016
See above list
Socket Ratchet
For items # 5, 8 and 9 listed above.
Some way of lifting the Santa FE, either a
hydraulic lift with stands, or ramps.
Optional
You will need to obtain besides the above
at either Home Depot or any hardware store 16 cut washers that have a 15/32
size hole. (Comes out less than 12 cents each). I'll explain later.
Wood Block (chucks)
SFE000B Santa Fe OEM Chromed
Letters
Time to install item:
Total time for mod:
60-120
min
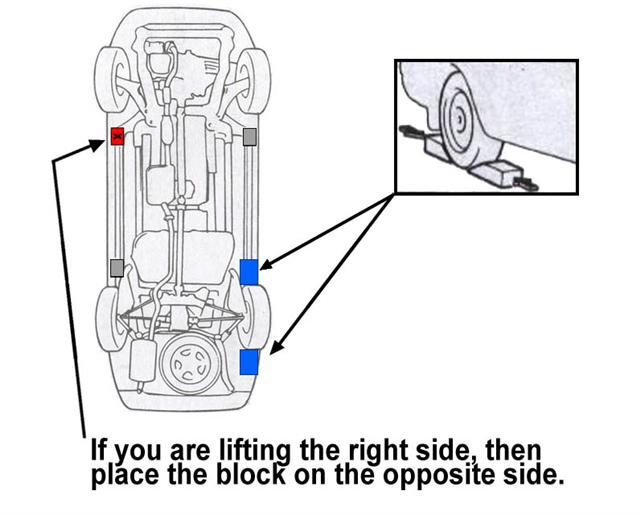
Step 1: Lifting
the Santa Fe.
Note: If using a
garage (floor) jack, perform Step 1a. Otherwise skip to Step 1b.
Step 1a. Lifting the Santa Fe using a garage (floor) jack.
Block the wheel, (by
placing a wood block
chuck) at the wheel that is at the opposite of the
side you are going to lift.
(SEE PIC # 04.)
You will need to lift the Santa Fe up either by placing her up on
ramps or using a hydraulic lift jack. (I bought one at Sears that included
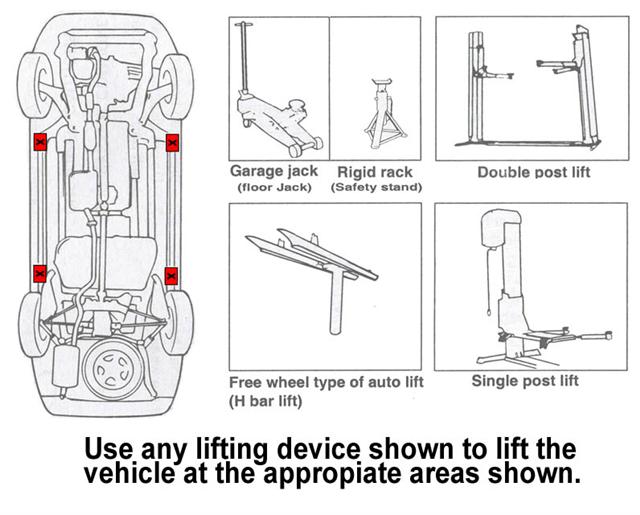
the 2 1/2 ton standsfor about $29.00.Of course on a shop lift you can do these steps standing up and much
easier.) This diagram shows you the areas where to
properly place the hydraulic lift jack to raise the vehicle.
(SEE PIC # 05.)
In order to
prevent scratching the sub frame, place a piece of cloth in the jack's
contact surface (to prevent corrosion caused by damage to the coating.)
Placed the hydraulic lift jack at the
proper section and lifted up the vehicle as far as
could go (about 15 inches) then placed the stands in. This should give you
enough room to work on your back and install the side steps without any
interference.
Picture shows where to place the hydraulic lift.
(SEE PIC # 06.)
Step 1b. Lifting the Santa Fe using a Shop lift.
Using the shop lift, raise the vehicle to an
appropriate height. (Refer to the diagram shown in picture # 5 above to locate
the contact points.)
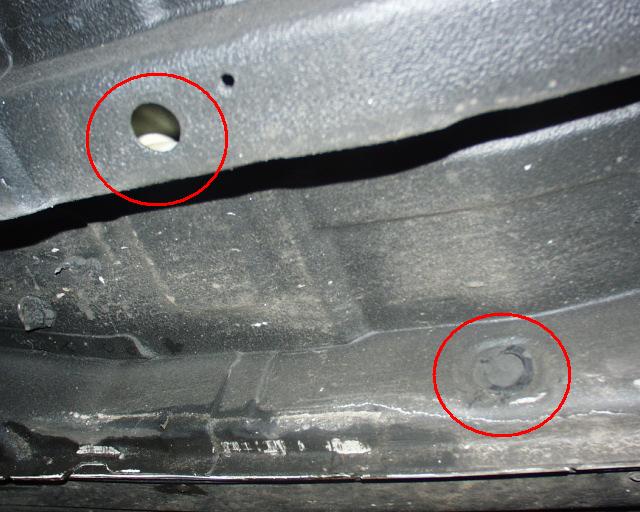
Step 2. Removing the
plugs.
At this point you will
located the 4 rubber plugs in the frame (right side front) where the side
step brackets will go. Take these plugs out.
(SEE PIC # 07.)
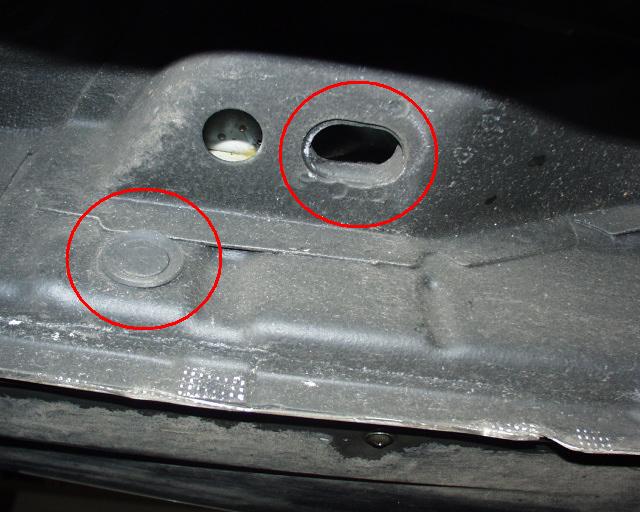
You will do the same for the right side rear.
(SEE PIC # 08.)
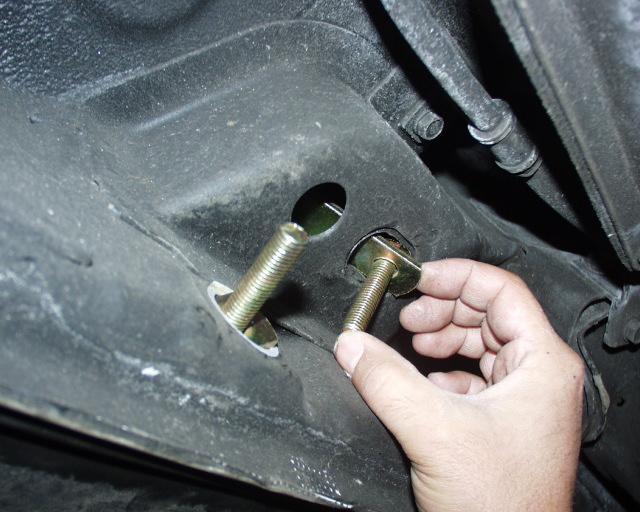
Step 3. Inserting
the bolts.
You will now take the Bolt
(Level Type) and insert them into the slots. You might need to use the
hammer to tap them in.
Picture shows the rear bolts being inserted.
Rear side shown.
(SEE PIC # 09.)
Do the same for the front right side.
(SEE PIC # 10.)
Step 4. Placing the
undercarriage brackets.
Starting with the front
right bracket, take it and insert it onto the bolts and take a nut (M10) and
screw it in. Do not tighten it just yet, since you will need to make final
adjustments later.
(SEE PIC # 11.)
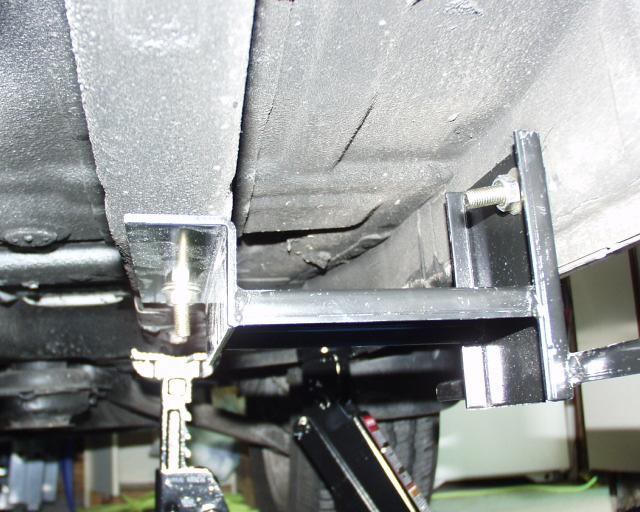
Do the same for the rear right bracket.
(SEE PIC # 12.)
Step 5. Placing the
side step brackets.
The side steps came with the side step
bracket already attached. (see pic 1 above). I found it
hard to place it onto the brackets that were attached (in the above step) to the
Santa Fe. Since I
was doing this by myself, I took them off the side steps so I can attach them
separately to the
other brackets. (If you have another person helping you you do not need to
separate the bracket from
the side steps just proceed to step # 6 to place the side steps onto the
brackets that you previously attached to the Santa Fe and insert the bolts and
nuts.
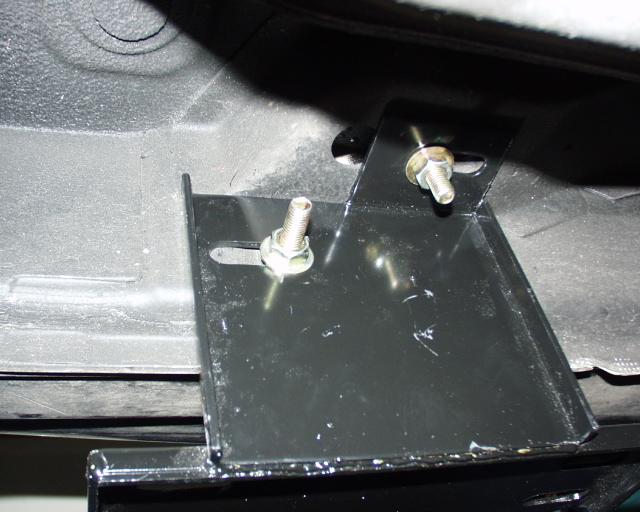
After I took off the side
step brackets I placed them onto the brackets that we just attached to the
Santa Fe. The washers that came with the product in my opinion are a bit two
small, cause once you tighten the nuts and bolts, the bolt might squeeze
through the holes on the bracket. Therefore I went to home depot and bought
a bit wider "cut" washer sized 15/16. Now the bolts are screwed in and
tightened.
(SEE PIC # 13.)
Do the same for the rear side bracket.
(SEE PIC # 14.)
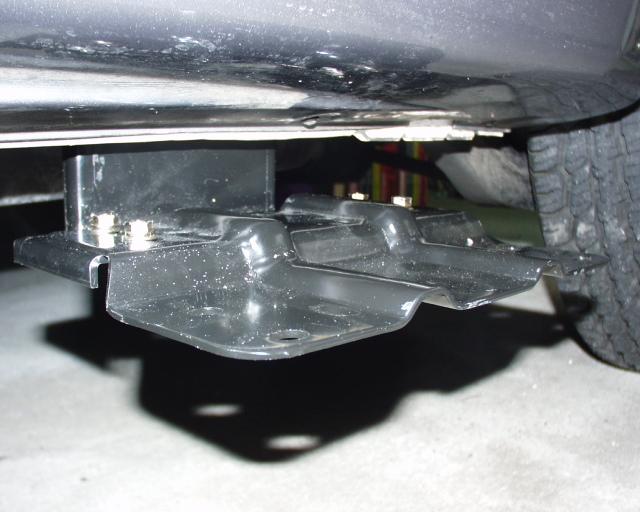
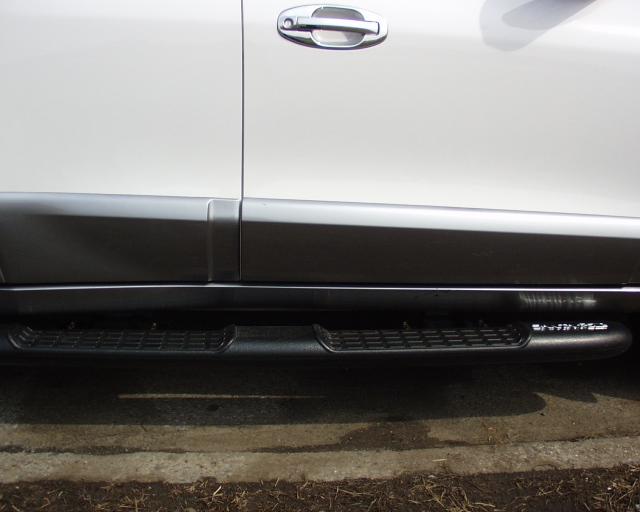
Step 6. Placing the
side step.
Placed the side step onto
the brackets and insert the bolts.
At this point you will proceed to tighten the nuts after you have spaced the
brackets to your preferred place.
Lower the vehicle and do the other side.
(SEE PIC # 15.)
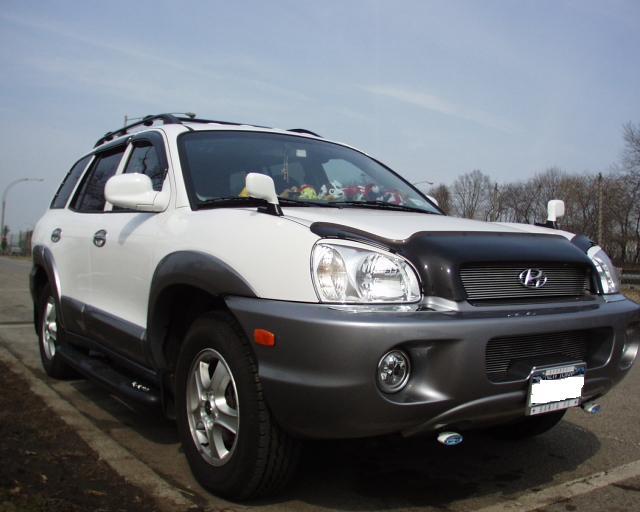
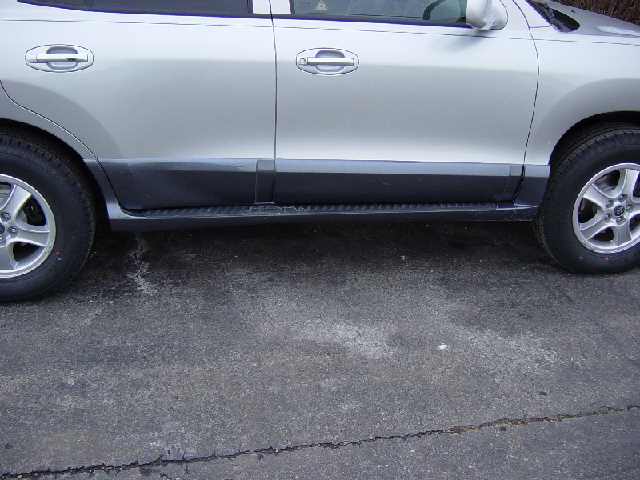
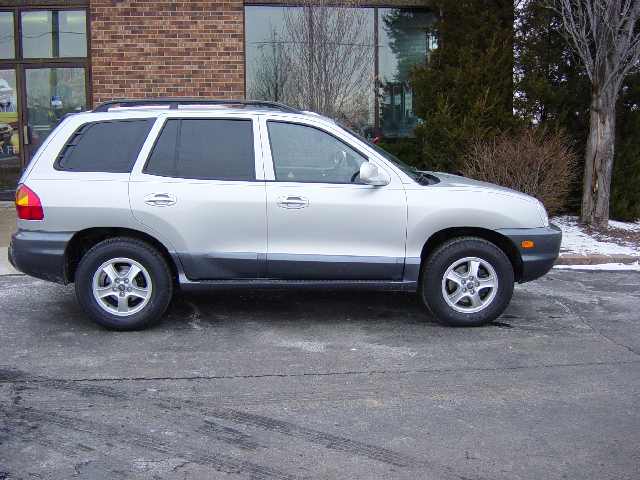
Final Views.
PIC # 16
PIC # 17
PIC # 18
PIC # 19
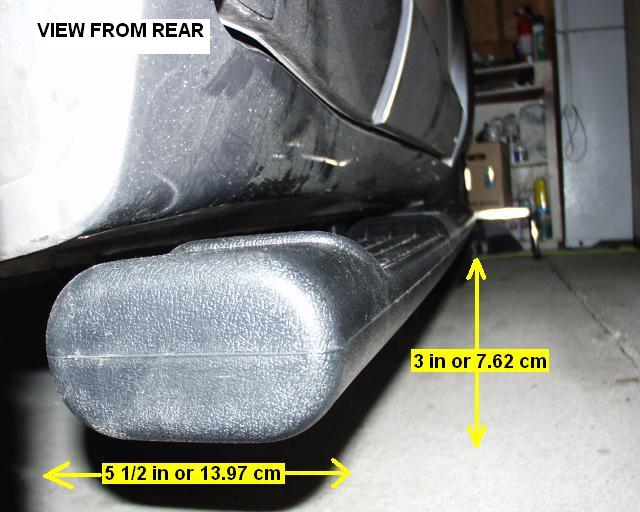
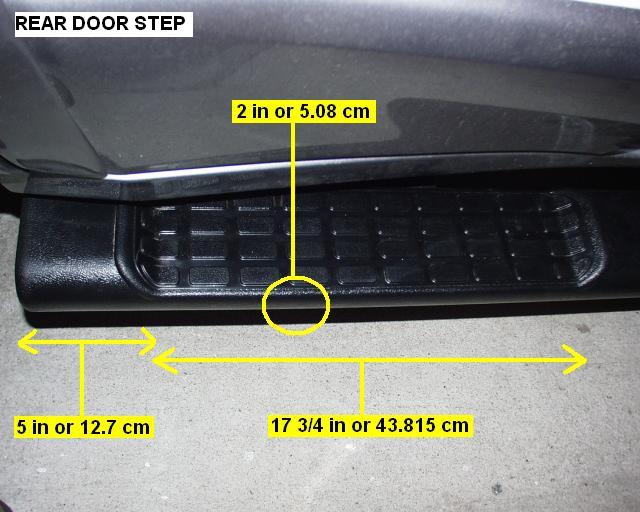
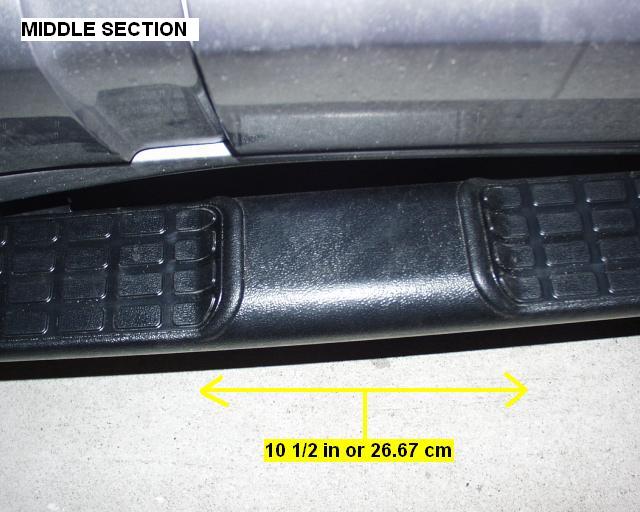
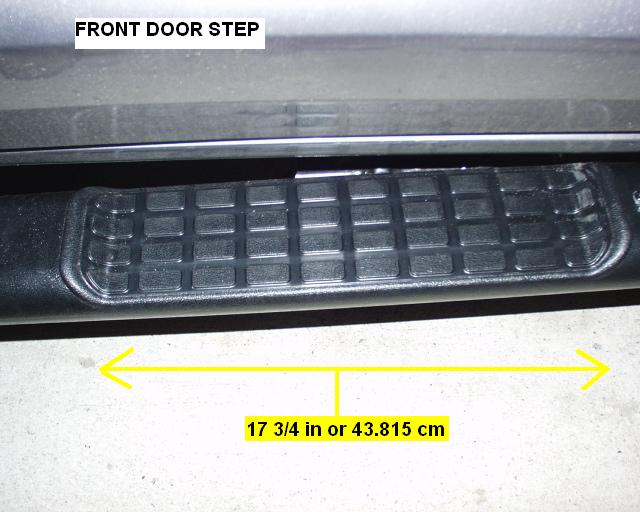
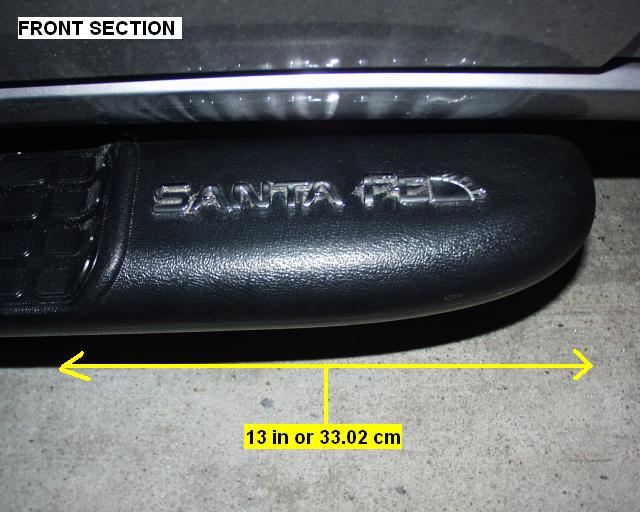
Additional Info -
Dimensions
Additional Info -
Adding an emblem to the side steps. (SFE000B Chrome Letters)
Peel off the tape backing
and place the letters where you want them to be. Gently lift the foam off
the letters and press onto the side step.
View of Chrome Letter
Emblem placed on side step.
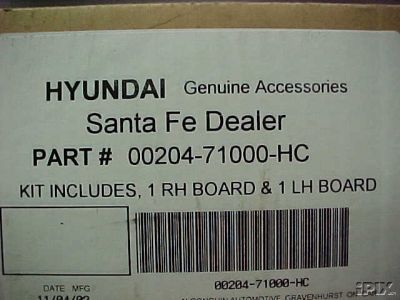
Hyundai side steps.
Hyundai also makes their
own side steps and the part number is shown in this pic.