Replacing your
Hyundai Santa Fe stock amber Side Markers
withClear Chrome ones.
Installer/Tester:
twospirits
Part supplier:
TFR Racing
Author/Images:
twospirits
Introduction
/ History
The Hyundai Santa Fe
comes with two amber side markers. These
side markers are the stock ones that Hyundai originally supplied with the
vehicle. The look and design of thesestock side
markers are quite plain and boring to some owners. The are numerous
aftermarket side markers that you can obtain to replace these and make it
look more European or more stylish. This Modification/report is of one such
product obtained from TFR Racing, (item # SFE006B).
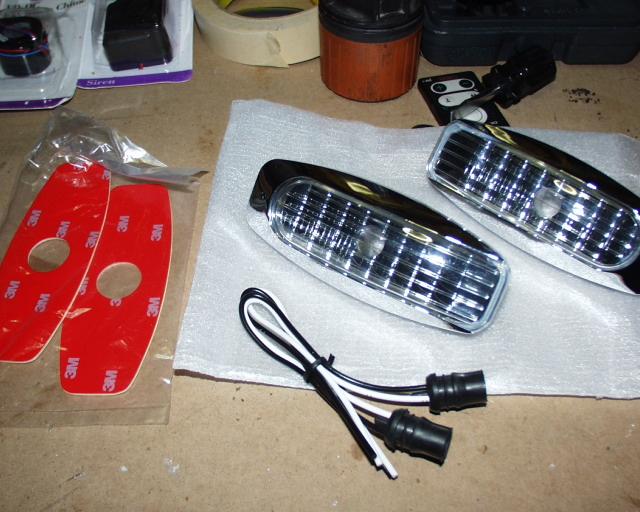
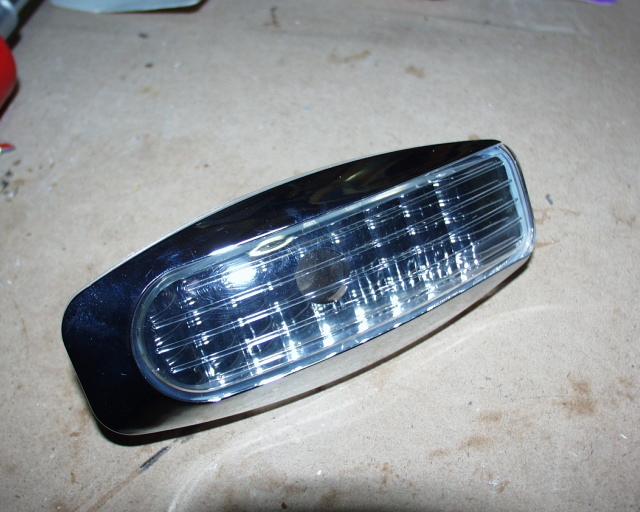
The item consists of two Euro style chrome marker lights with a clear lens,
two 3M double side tape and two wiring sockets. The bulbs are not included
to allow the buyer to use whatever 194 color bulbs they choose too use.
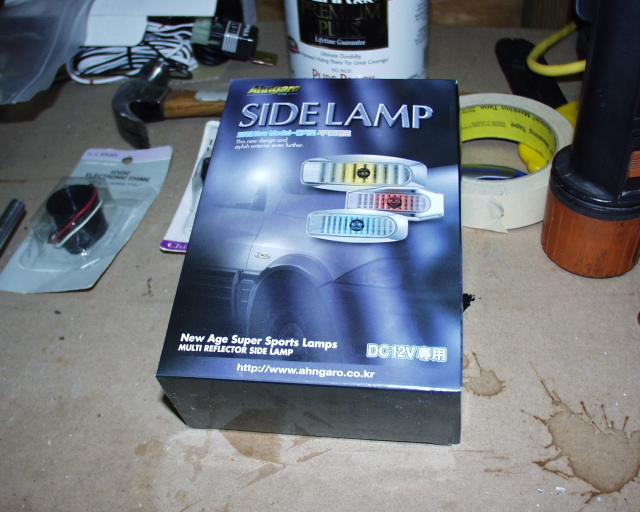
SFE006B Santa
Fe Chromed Crystal Lens Clear Side Marker
Box
Box Contents
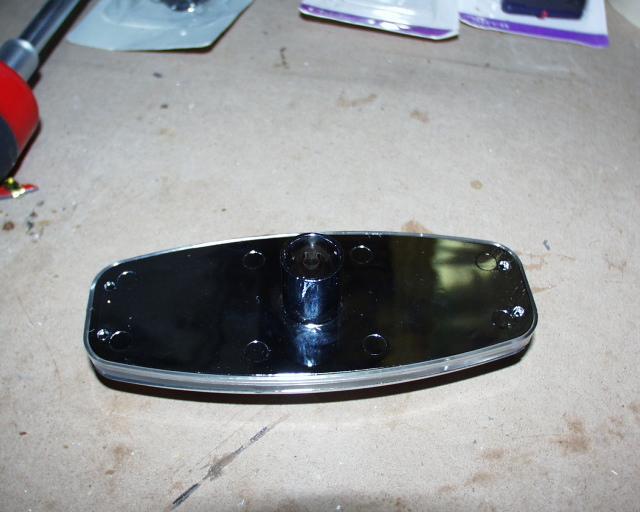
Chrome Side Marker
Back Side View
Side View
Time to perform modification:
Total time for mod:
30-45 min
Observations:
Reason why extending the market socket wires is necessary.
The marker itself is sealed
very tightly and is larger enough to cover the side marker hole on the
fender. There is no need for drilling. If the bulb ever burns out, replacing
it is done from behind the marker, which means that you will have to remove
the combination headlamp. Quite easy to do, but will take a few minutes more
when compared to the stock ones. The wire sockets are about 8 inches in
length and is sufficient if one were to connect them to the existing wires.
But this leads to a problem when you want to replace a burned out bulb.
Therefore the best way to connect them would be to the combination headlamps
and discard the existing stock side marker wires. Connecting the new side
marker wires to the combination headlamp while at 7 inches in length is
still not long enough to reach the lamps and give you enough room to connect
them, therefore it is necessary to extend the length by adding more wire to
them as shown in the steps below.
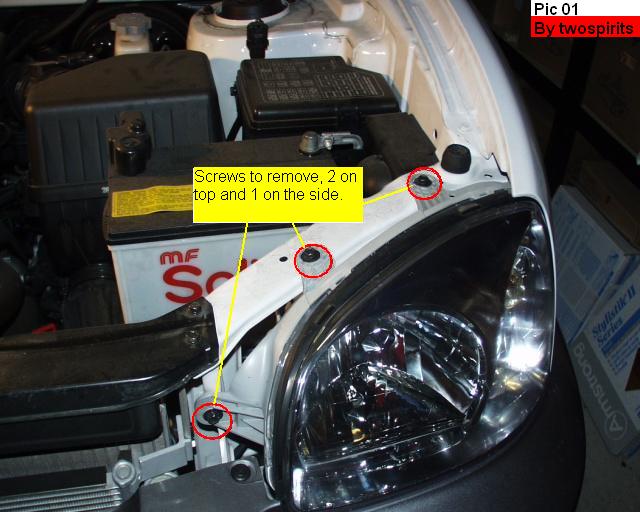
Step 1: Removing and preparing the Combination lamp.
First off, you should disconnect the negative battery terminal.
The Combination lamp is attached to the body by 3 screws. Two of them are on
top of the headlights and one to the inner side of it. (See pic 01). After
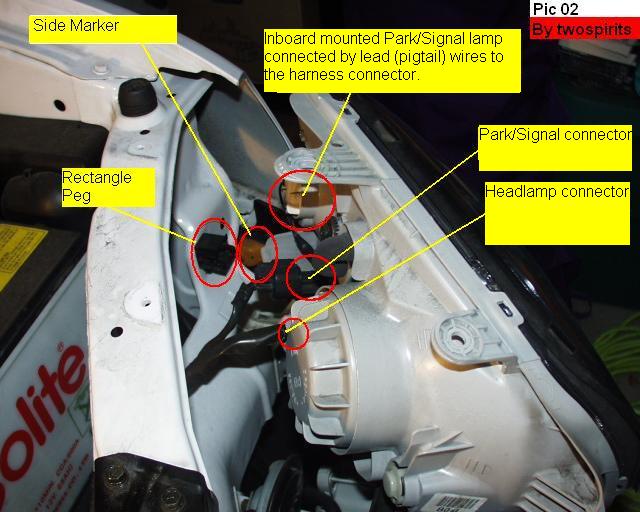
you unscrew the screws you will need to insert one hand behind the lamp and
push towards you to dislodge it from the body to give you more flexible
room. There is a rectangular peg that aligns it to the body and it really is
tight. (See pic 02).
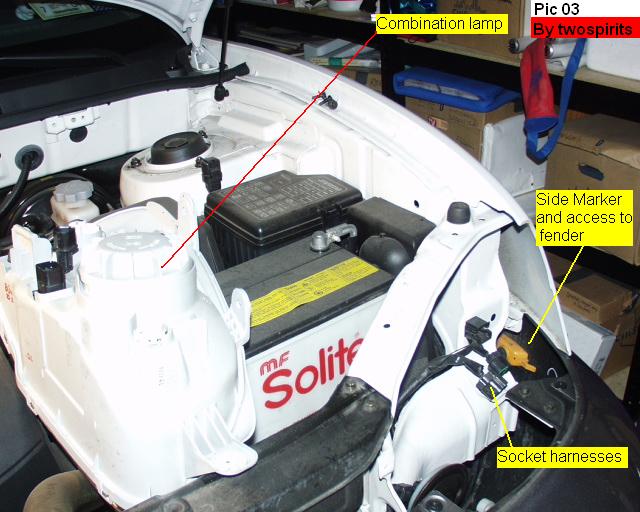
Once the combination lamp is detached from the body, you will see the two
wiring harness connectors. (See pic 02). One is for inboard mounted
park/signal light; the other is the headlamp light. Detach these wire
harness connectors from the combination lamp by pressing down on their
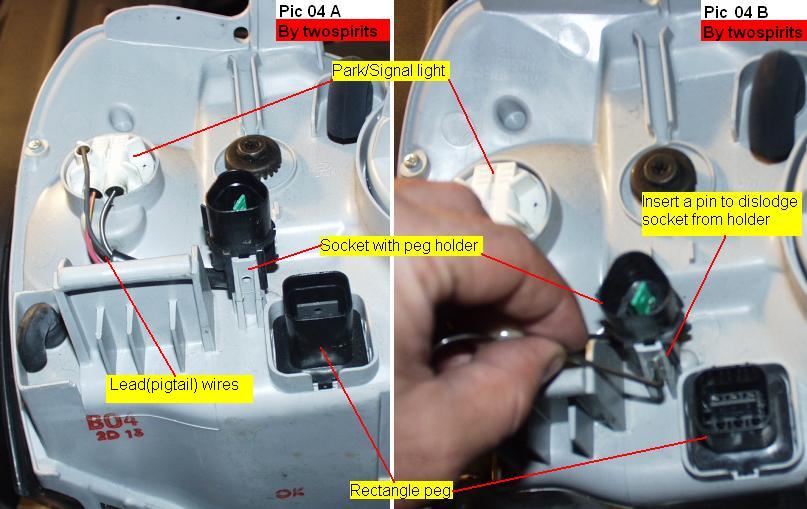
clips. The Park/Signal harness connector connects to a lead (pigtail) wire
(see pic 04 A) directly to the Park/Signal light which stays attached to the
combination lamp housing for the time being.
After you
remove the combination lamp you will see the side marker from the opening.
This opening is where you will be able to fish the wires later on. (See pic
03).
Place the
combination lamp housing in a comfortable area to work with. Turn the
housing so that the big round knob is to your right. This will allow you to
see the peg holder that holds the lead (pigtail) wire connector to the
housing. (See pic 04 A) You need to take out the connector in order to have
ample room to work with it. (See pic 04 B).
I used a hex screw to push in the hole to pull the connector out. You may
find something else that is better. Once you dislodged it put it to the side
to work on it later.
Step 2: Removing and preparing the Side Marker.
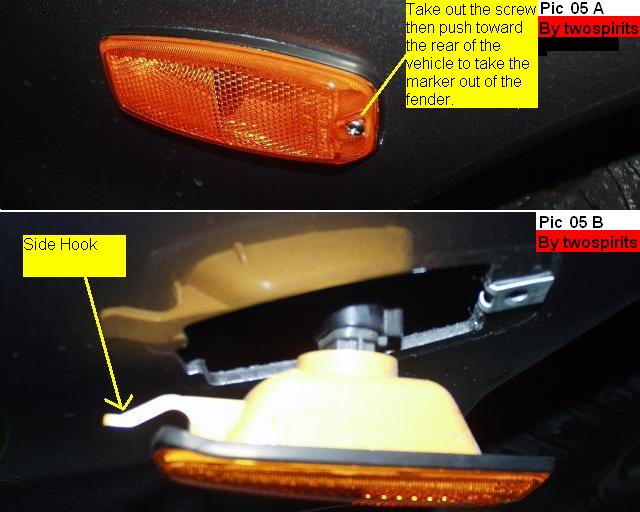
The side
marker is attached to the fender by one screw and a hook. (See pic 05 A)
Unscrew the screw and push the marker gently towards the rear of the vehicle
then towards you.
Once the marker is out you will notice the hook. (See pic 05 B).
Once the
marker is detached from the fender, detach the marker light from the side
marker housing. Set the housing to the side.
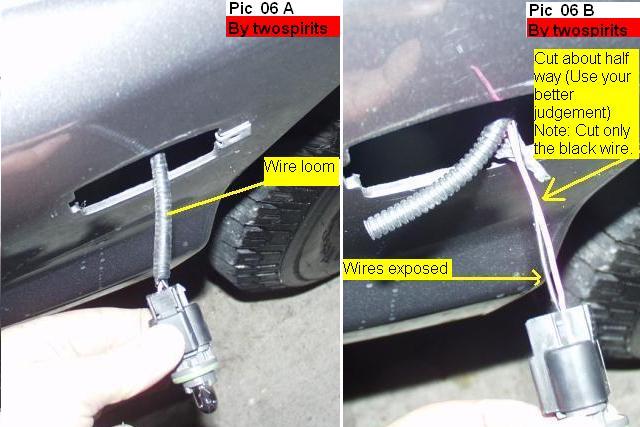
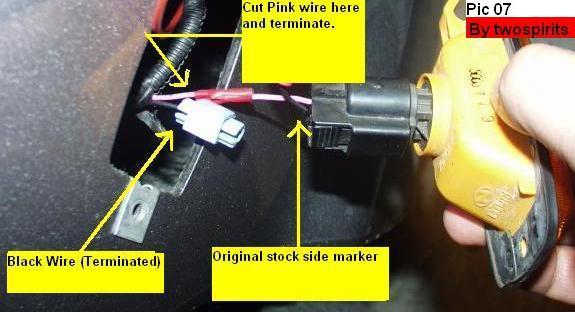
The side
marker has two color coordinated wires. One Black and One
Pink.
These wires are covered in a wire loom that is also wrapped in electrical
tape. (See pic 06 A) Take off the electrical tape. The wire loom will then
be exposed. This loom is cut open on one side; carefully take out the wires
out of the loom.(See pic 06 B)
As you can see there is not that much room to work with.
Cutboth wires.
Make sure you leave enough room to be able to work on both ends of the cut
section. I chose to cut it at the point the wires meet
the marker. Terminate the wires by either attaching butt connectors or
wrapping in electrical tape. Place the wires back into the fender area.
(See pic 07)
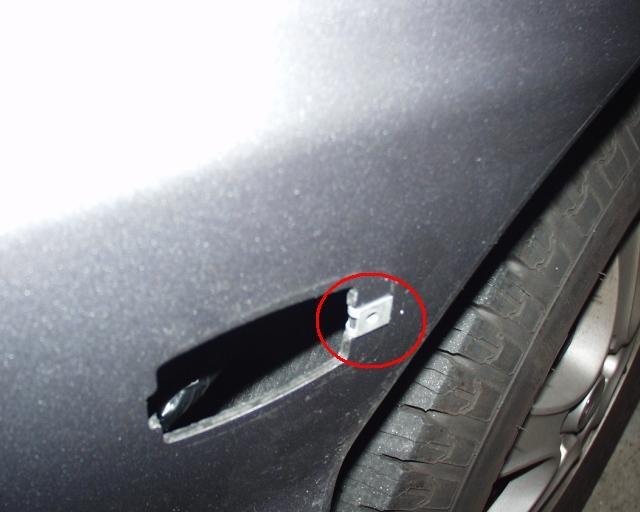
There is
a screw clip in the side marker hole on the fender. Take this clip out, you
will not need it anymore. Clean the area around the
side marker hole in the fender with rubbing alcohol. Let it dry.
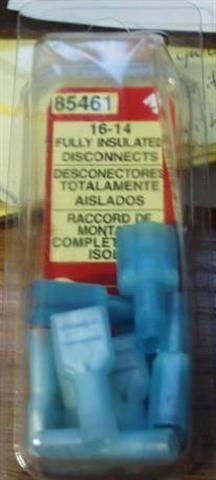
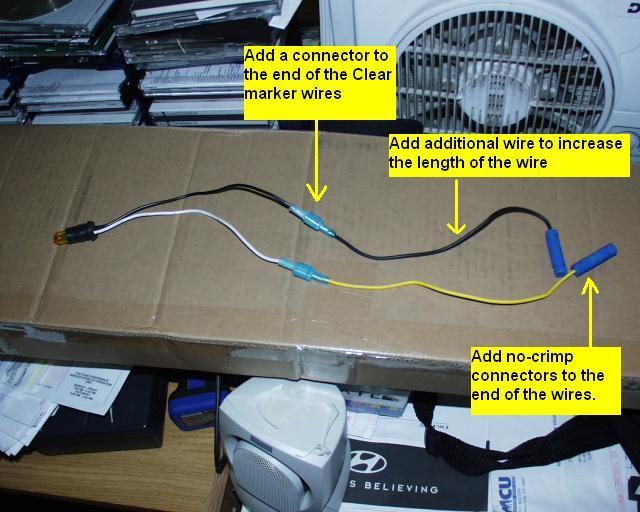
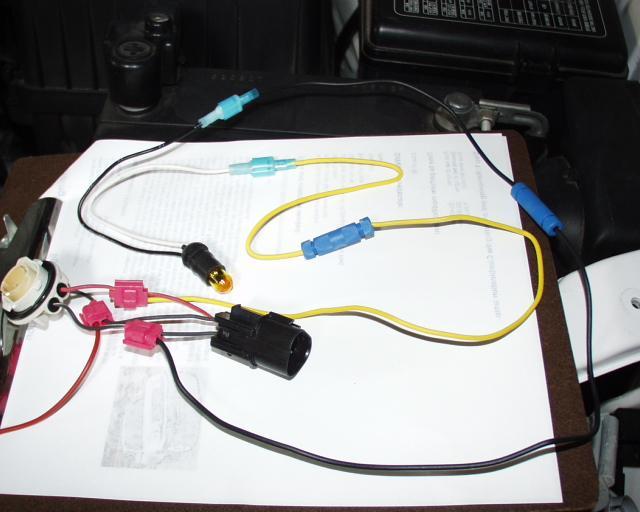
The Clear Side
Markers' wire are a bit too small in length, so we need to extend the length
by adding more wire to it. Add a Fully insulated disconnect connector to the
end of the wires. Then add one black wire about 6 inches in length to to
existing black wire. Add one yellow wire to the existing white wire.
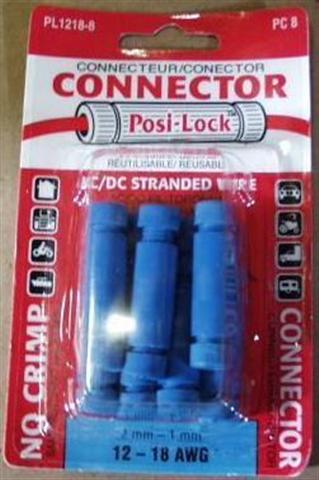
Then add no-splice (Posi-Lock) connectors to the end of the wires. (See
pic.) This will give you plenty of length to reach the headlamps.
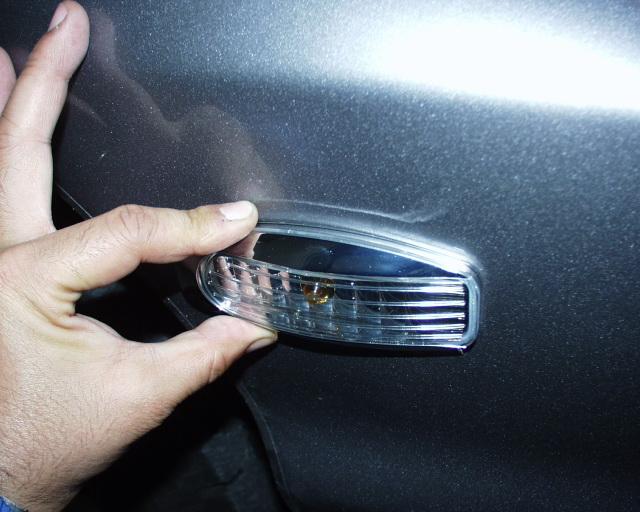
Take the supplied 3M
tape and attach it to the rear of the clear side marker. Take off the 3M
tape cover. (See pic.)
Place the side marker
over the hole in the fender. (See pic.)
Step 3: Wire Color coordination.
Both the side marker and
the combination lamp have color-coordinated wires. These colors are outlined
in the 2002 Hyundai ETM (Electrical Troubleshooting Manual). But the colors of the wires that consist of the lead (pigtail)
wires (mentioned in step 1 above)
are not in the ETM.
The following
diagram/links will show you how to hook up the side
marker.
Step 4: Wiring the Side Marker
to the Combination Lamp.
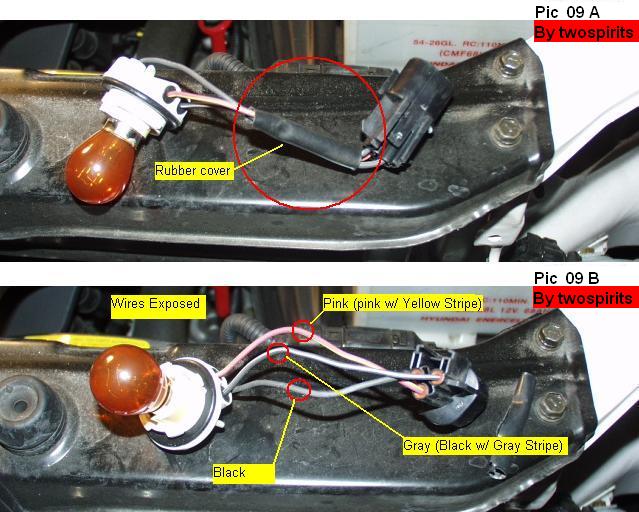
Take the
lead (pigtail) wire harness and take out the rubber cover of the wires. I
used a utility knife.
You may
want to remove the light to prevent damage to it. (See pic 09 A)
Once you
have the rubber cover off you will have better access to the three wires of
the lead (pigtail) wire harness. (See pic 09 B)
Both the left and right lead (pigtail) wires have the same colors. Black,
Black with White stripe, and a Pink with yellow stripe wire. (See wiring
diagram above)
You will be connecting the new black wire (about 7 inches
in length) to the black with white stripe wire of the pigtail using a y
connector.
You will also be connecting a new yellow wire (about 7 inches in length) to
the Pink with yellow stripe wire of the pigtail using a y connector.
(See pic 10). The ends of these two wires will then be connected to the
Posi-Lock connectors at the end of the new side markers. This allows for a
quick disconnect and they can be reusable. (suggestion recommended by fellow
forum member krcooper.)
Insert the bulbs back in the
sockets and reattach the harness back into the combination lamp. Insert the
side marker bulb into the side marker and test the lights.
Step 5: Test the lights.
At this
point you should have reconnect the wiring harnesses to the combination lamp.
Reconnect the negative battery cable and insert your ignition key and test
the lights.
They should at this point work and perform the following functions.
1-
Should come on when you turn on your parking lamps.
2-
Should flash as directional signals with parking lamps are on
or off.
(They will work in different / alternating flashes. ex: When
the parking light goes on the marker goes off and vice versa.)
3-
Stay on when using the hazards.
Step 6: Perform the steps on the other side.
Perform
the necessary steps on the other side of the vehicle, and
retest them.
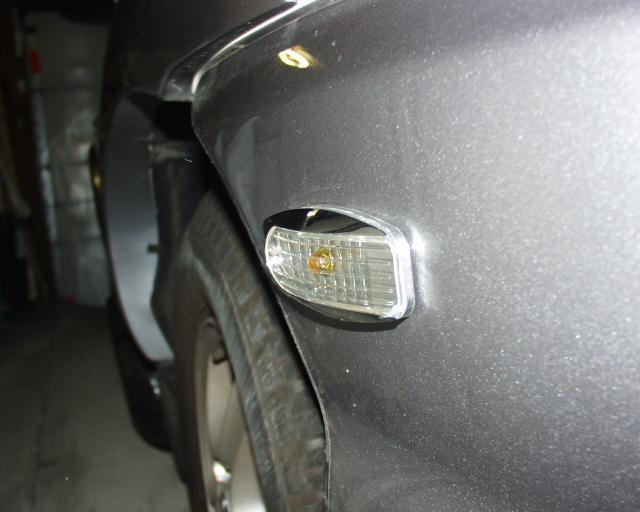
Step 7: Reinstall all the lamps.
Reattach
all lamps back into their housings and enjoy your new
Euro style chrome signal marker lights.