Adding LED Bar Brake lights and replacing the stock one
Modification
Original idea:
twospirits
Idea
enhancements:
Onigoroshi
Tester, Author, Images:
twospirits
Introduction
/ History
The
view out the Hyundai Santa Fe
rear hatch window is smaller compared to the width of the hatch. The view is
less when one attaches a Rear
Hatch Mirror. Unfortunately when one places a rear Hatch Mirror on the
Santa Fe, it has to be place to the right side. Not only does this limit and
reduces the view even more, but when viewed from behind you have a mirror
sticking out that is too one side and disrupts the smoothness of the rear
not being even. The ideal place for the rear Hatch Mirror would be right in
the middle o the hatch, but this would cover the stock 3rd LED brake light
from being seen by any driver behind you, which is not only dangerous but
illegal. This modification addresses this problem, by placing additional LED
Bar brake lights on each side of the stock brake light those that have the
hatch mirror can place it in the middle. This evens out the look from the
rear, plus gives the Santa Fe an even more unique look. This modification
can also be done for those that do not have a Hatch Mirror. The resulting
look is unique as well.
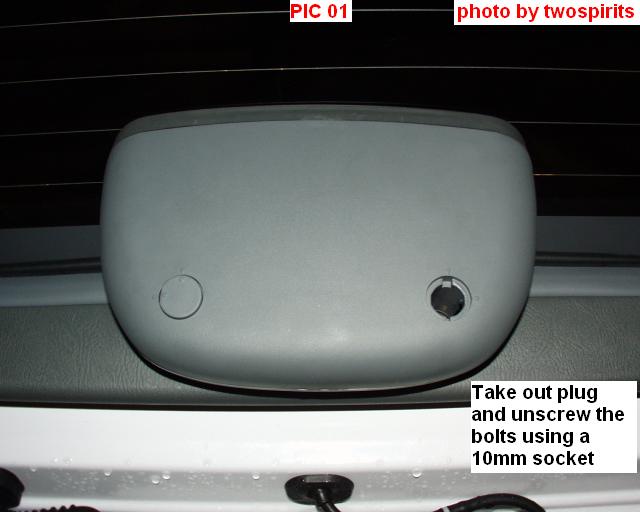
I would disconnect the
negative battery cable (just in case).
Open the rear hatch and take out the plugs from underneath the stock 3rd
brake light. You will need a slim size 10mm socket wrench attachment to
unscrew the bolts, otherwise it will not fit inside the hole.
(SEE PIC # 01.)
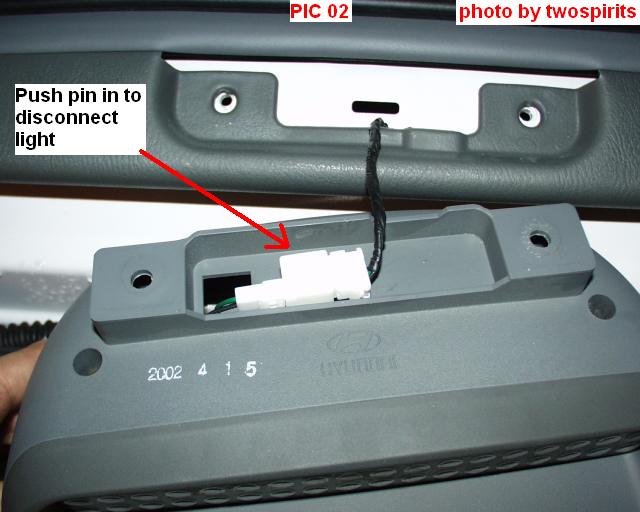
Once the stock 3rd Brake
light is detached, you will notice the wire connector. Push the pin in to
disconnect it. Put it to the side for now.
(SEE PIC # 02.)
Step 2:Finding
the right spot for the lamps..
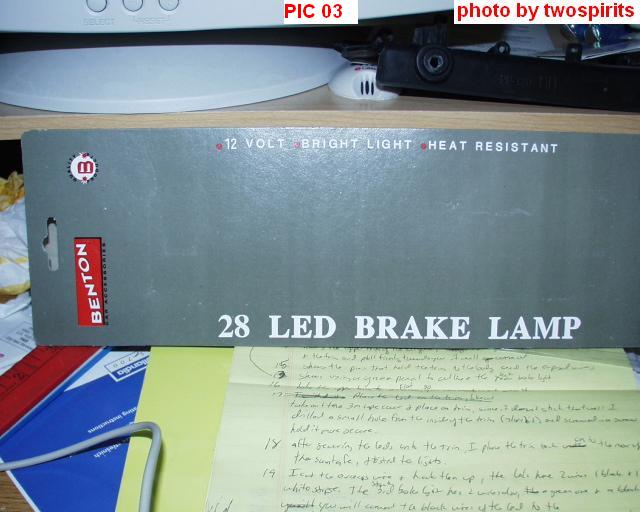
The LED bar lights I'm
using for this mod are the Benton #1997 12 volt, 28 LED Bright Brake Lamp. I
purchased two of them at Pet Boys Toys, but I'm sure you can get any
compatible led bar from any auto shop. (SEE PIC # 03.)
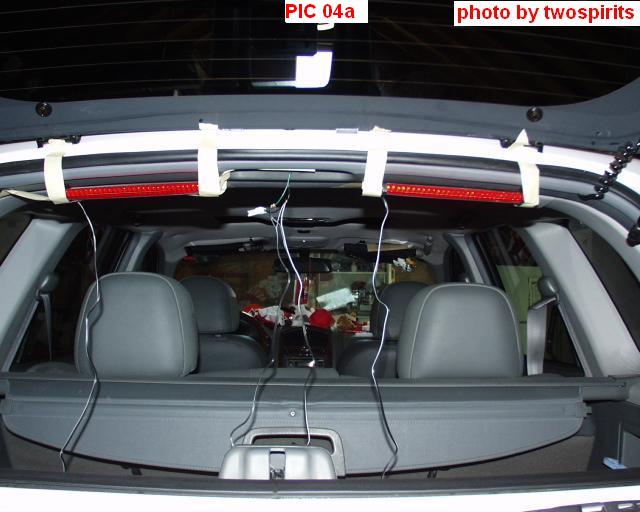
I placed the led bar lamps
where I thought they would look best by using masking tape. I also connected
them just to see if the look was what I was going for. I'll go over the
actual wiring later on. (SEE PIC # 04a.)
The view of the led bar
lamps with the hatch closed. (SEE PIC # 04b.)
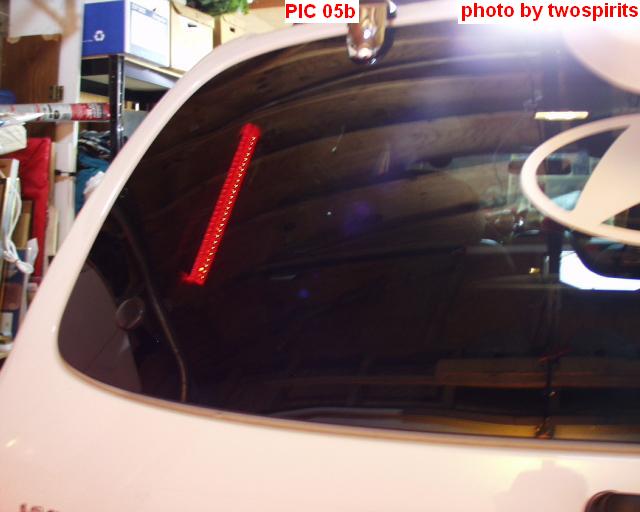
I also placed the lamps on
the left to see if it look good, which it does, but due to the nature of the
design, the lamps would have to be placed on the gas struts. (SEE PIC # 05a.)
As you can see, it looks
good. Yet as mentioned above it would have to be placed on the gas struts
and there is no way that I can think of to keep them there permanently. So I
resorted back to my original idea of placing them on the top. (SEE PIC # 05b.)
If you notice in pic # 04a above that the wires leading out of the lamps is
on the left of the lamp. This would make the left lamp have a wire more
exposed than the right one, so I decided to do some fixing. If the lamps
that you get do not have the wires coming out on the same side then you can
skip step 3 and proceed to step 4..
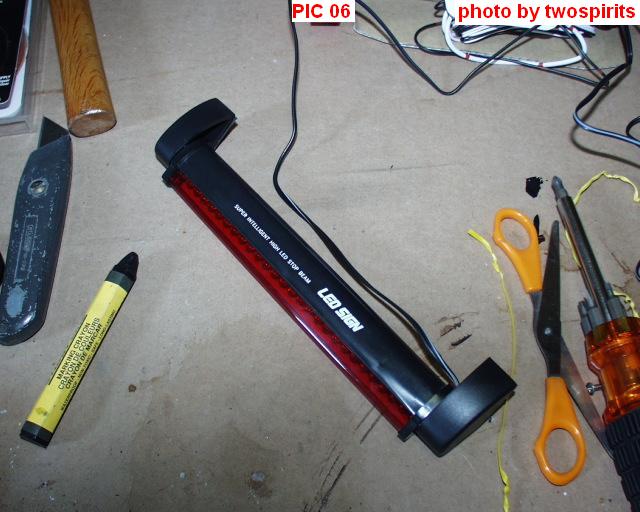
Step 3:LED
preparation.
I place the left lamp on a
work (bench) area so I can work on it much better. (SEE PIC # 06.)
I took it apart, which was
quite easy.
(SEE PIC # 07.)
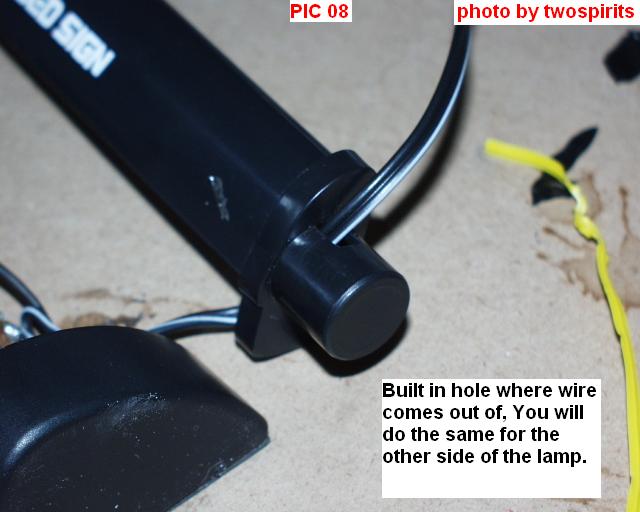
The lamp has a built in
hole on the left side that allows the wire to come out of. You will
duplicate this hole on the left side. (SEE PIC # 08.)
I took the ends out and
with a dremel tool I took out some of the plastic that made part of the
inner circle wall. I then drilled a hole (use 5/32 drill bit). I actually
drilled a small hole in the right lamp end also for reasons I'll explain
later. (SEE PIC # 09.)
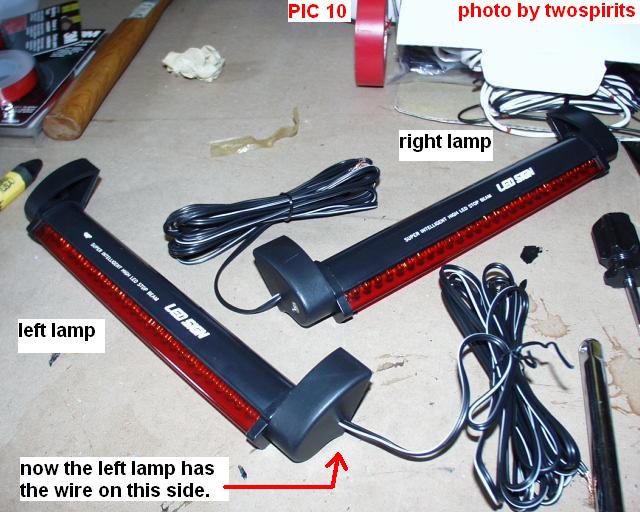
I put the pieces
back together and the result is shown. Now the wires of the left lamp go out
on the right side of the lamp. (SEE PIC # 10.)
Step 4:Hatch
Trim preparation
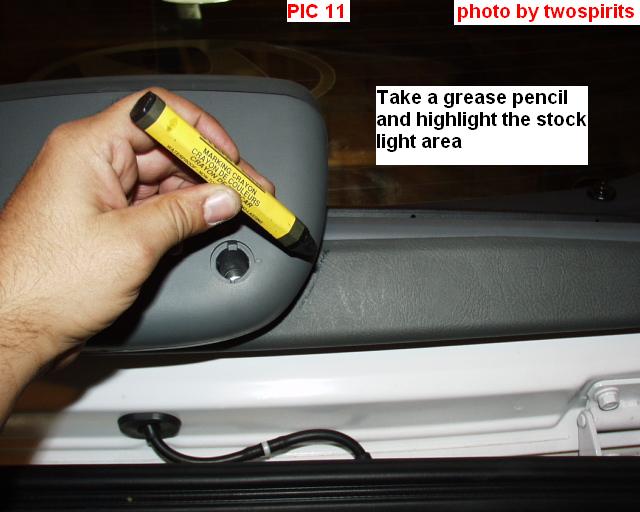
Place the stock 3rd brake
light on top of the trim and with a grease pencil outline the area the brake
light takes up. Remove the brake light and store away for now. (SEE PIC # 11.)
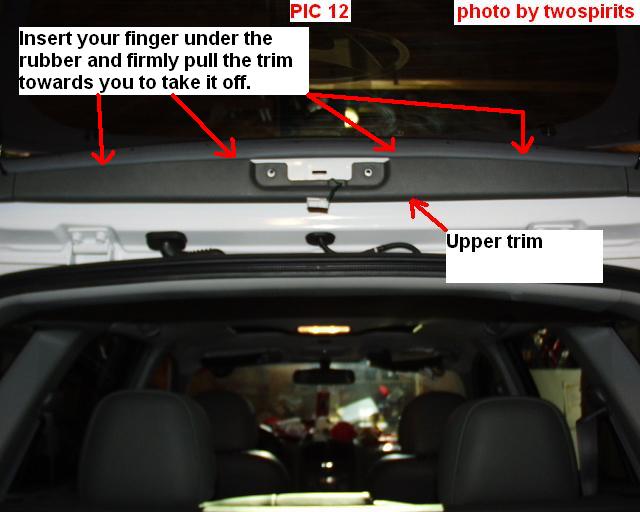
You will take your finger
and insert it in between the rubber and trim and gently but firmly pull the
trim towards you.
(SEE PIC # 12.)
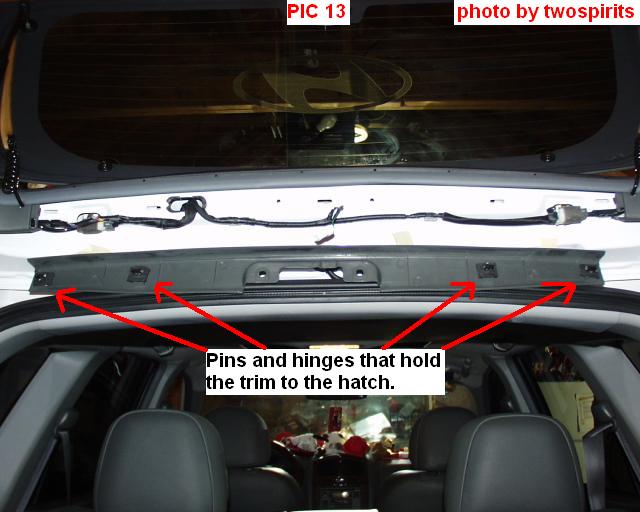
The trim is held by 4 pins
and hinges as you can see. (SEE PIC # 13.)
Place the upper trim on
your work area. (SEE PIC # 14.)
Take off the 3M tape cover
off the lamps and stick them on to the trim. (They will not stick and stay
on forever, so we will have to attach them with screws. Drill a hole where
the end pieces of the lamp will sit. Take screws and screw it in and attach
the lamps. (SEE PIC # 15.)
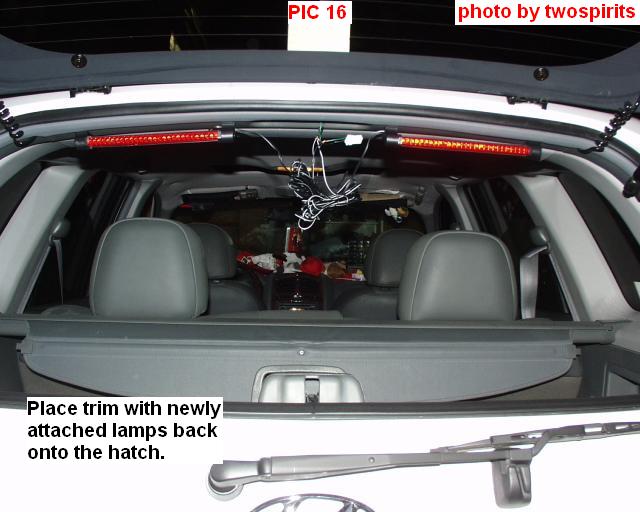
Reattach the upper trim
back onto the hatch. Make sure the rubber weather-stripping goes over the
trim. (SEE PIC # 16.)
Step 5:Wiring
the lamps
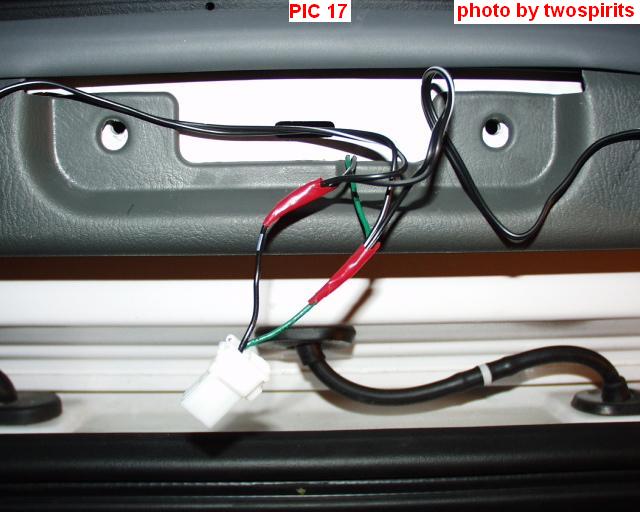
If you haven't done so
already, disconnect the negative battery cable. Shave of a bit of the stock
brake light wire insulations. The stock brake light has two wires a black
wire and a green wire. The lamps also have two wires a black one and a black
one with a white stripe.
Take the led lamps' black wire and attach them to the stock lights green
wire.
Now take the led lamps' black with white wires and attach them to the stock
lights black wire.
I would reconnect the negative battery wire and test the light.
(SEE PIC # 17)
Disconnect the negative
battery wire again.
Wrap the wires in electrical tape. and tuck the lamps wires underneath the
rubber weather-strip of the hatch.
(SEE PIC # 18)
Step 6:Deciding
the final look.
Its up to you to decide
whether you want to keep the stock 3rd brake light working or not with the
LED lamps.
This pic shows the lamps on without the lamp on. If you like this look
proceed to Step # 8.
(SEE PIC # 19)
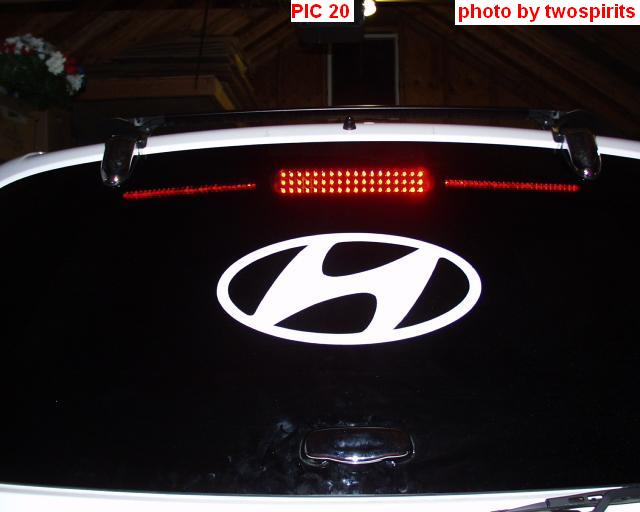
This pic shows the lamps
on along with the 3rd brake light. If you like this look proceed to Step #
7.
(SEE PIC # 20)
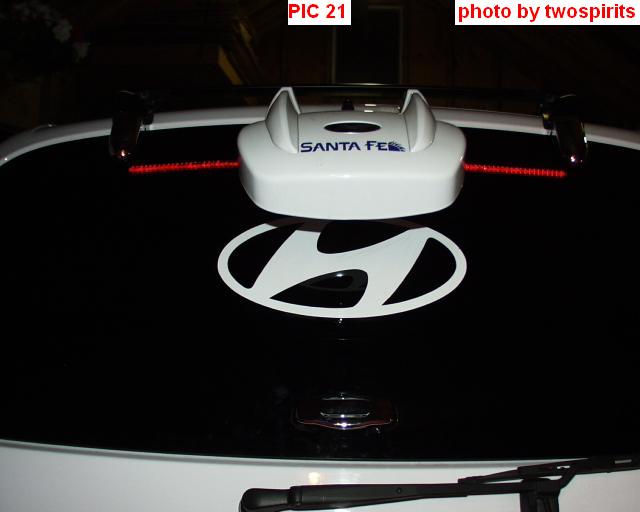
For those owners that do
not have a Hatch Mirror and decide to place it in the middle instead of the
usual side, you can proceed to the final step # 9
For those with a Hatch Mirror, please note it does not matter if you connect the stock
3rd brake light to light up because it will not be seen by the driver behind
you, but you will have to do one further modification, to the rear wiper.
(See step # 9 below)
(SEE PIC # 21)
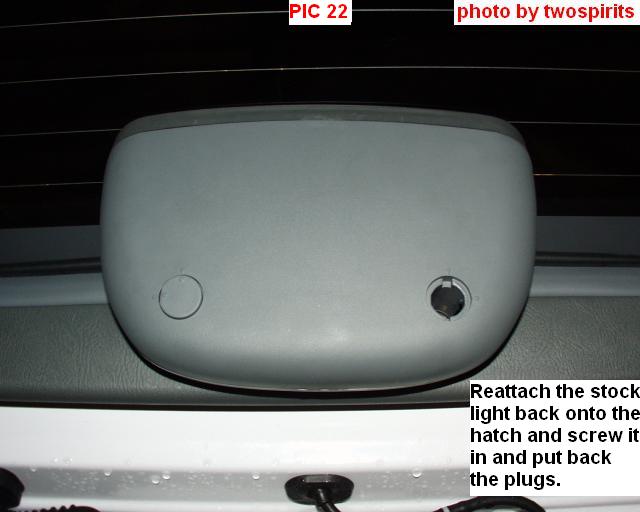
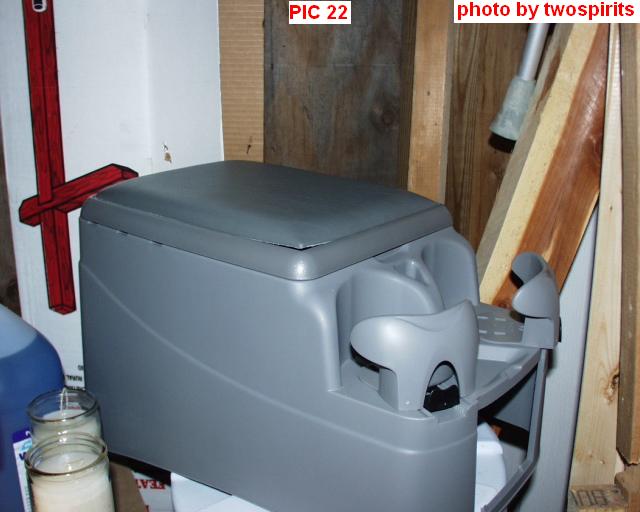
Step 7:
Reattaching the stock 3rd brake light.
Place back the stock 3rd
brake light onto the hatch and screw in the bolts and place the plugs in the
hole. Enjoy your new Lamps.
(SEE PIC # 22)
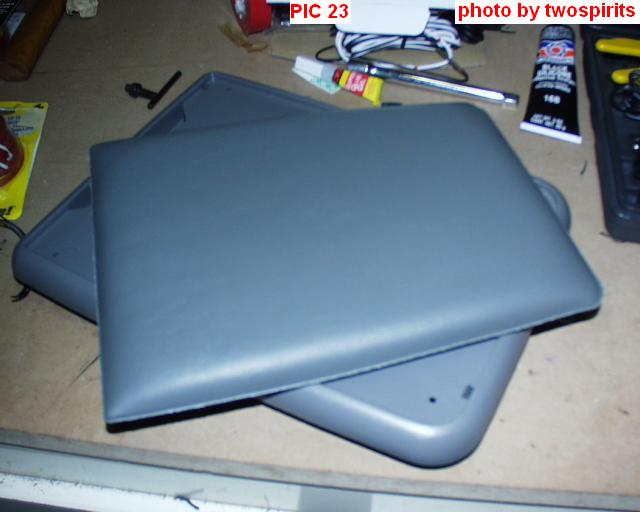
Step 8:
Stock Brake Light replacement.
Step # 8 is just for those
owners that have the Hatch Mirror and decided to place it in the middle to
have LED lamps on each side.
By removing the stock 3rd brake light you end up having a open area that
exposes the wires (see pics 2, 12, 17). I needed to cover this area and
decided on using the vinyl cover of a middle console that I bought for the
rear seats a while back. Since I don't use it anymore it was a perfect
candidate for the final steps of this project.
(SEE PIC # 23)
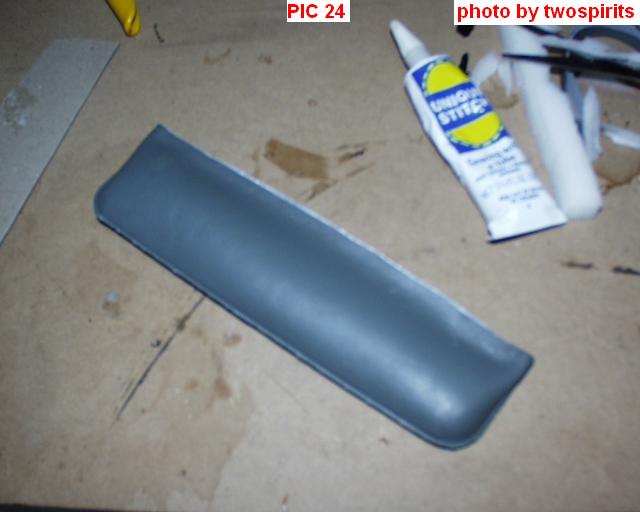
I took off the top of the
console, and detached the vinyl top off the lid. (its attached by sticky
tape so it was easy).
(SEE PIC # 24)
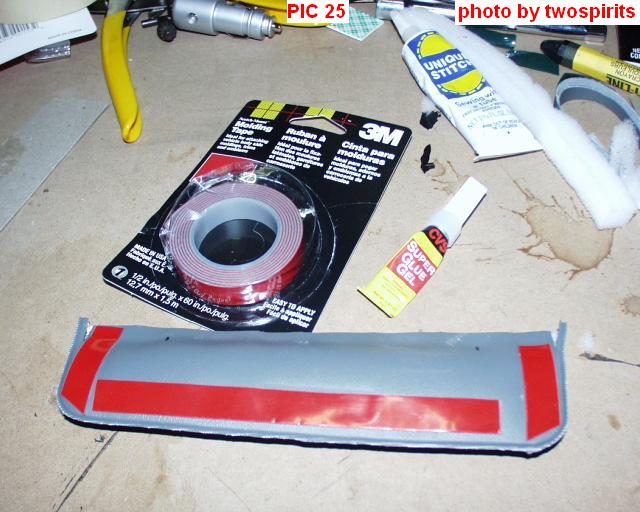
I cut the vinyl to the
right size and used crazy glue/contact cement to attached the cut ends. The
vinyl has a foam inside, so it makes it look plush.
(SEE PIC # 25)
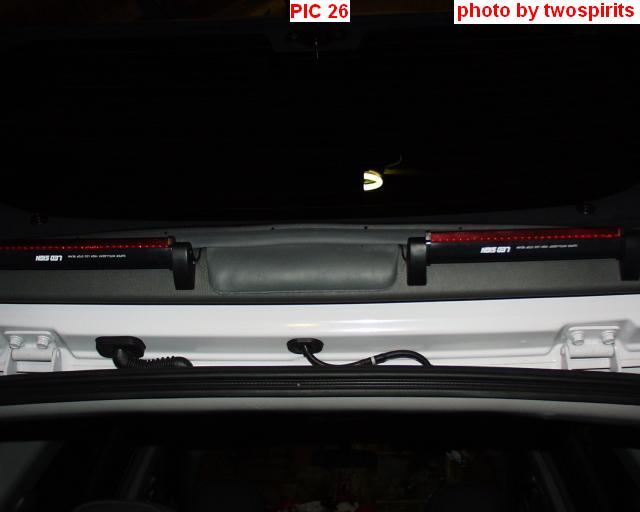
I turned it around to
attach the 3M tape to it.
(SEE PIC # 26)
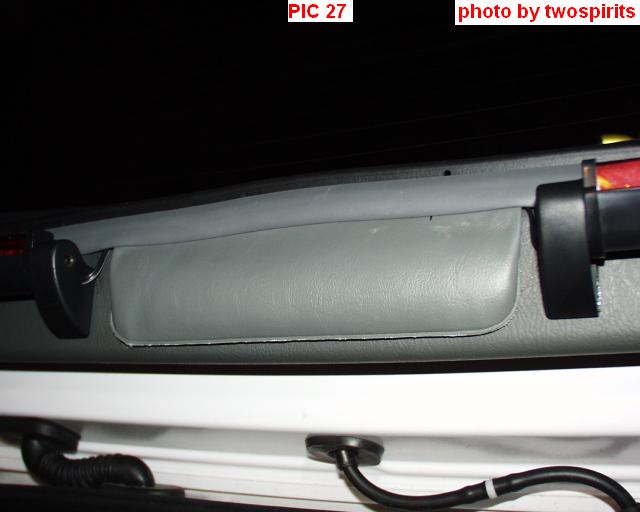
I place the vinyl onto the
trim, making sure that the top part of it is tucked under the rubber
weather-stripping.
(SEE PIC # 27)
This is a close up of the
attached vinyl. Doesn't look half bad almost OEM, especially knowing that it
can't be seen until you open up the hatch and get up close.
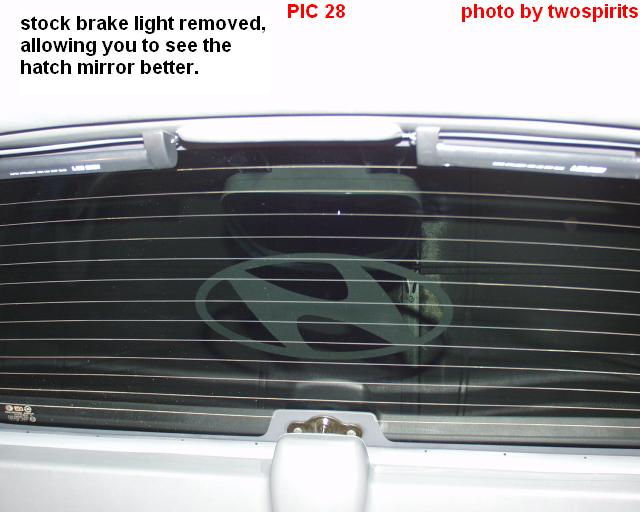
(SEE PIC # 28)
Now that the stock light
is removed and the vinyl took its place the area is more opened up. This
allows me to see more of the Hatch mirror (since its in the middle now).
(SEE PIC # 29)
Step 9: Rear Wiper Fix /
Replacement if you place the Hatch Mirror in the middle of the rear window.
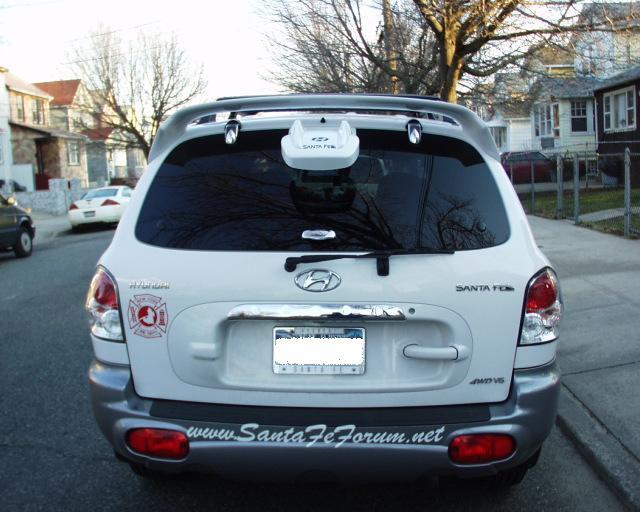
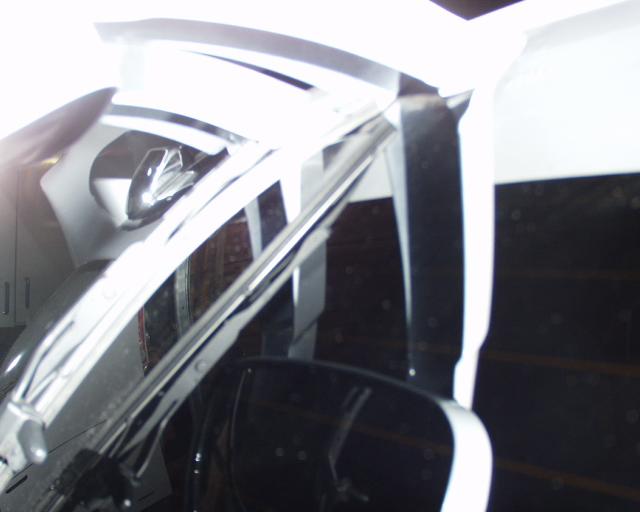
I placed the rear Hatch
mirror in the middle with this modification so the rear looks more uniform
instead of having the Hatch mirror placed to the side like it usually is.
(SEE PIC # 30)
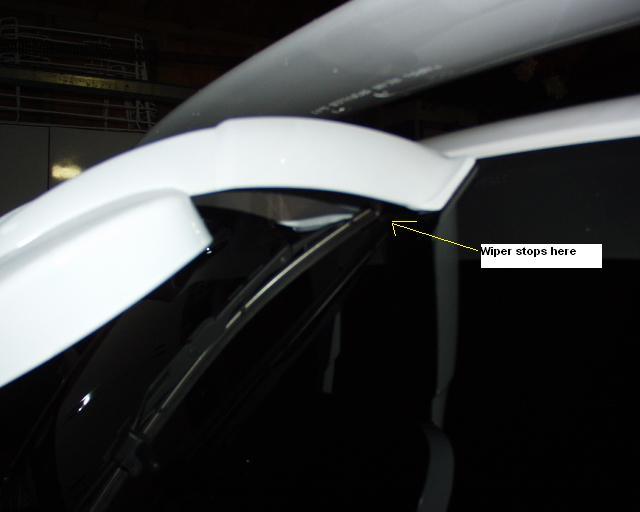
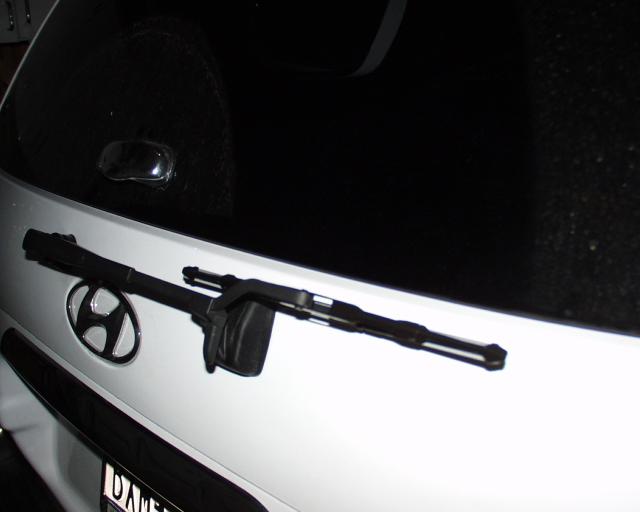
Placing the Hatch Mirror
in the middle brings up a problem of making the Rear Wiper totally unusable.
It stops half way, and can possible burn out the motor since its trying to
continue on its path.
(SEE PIC # 31)
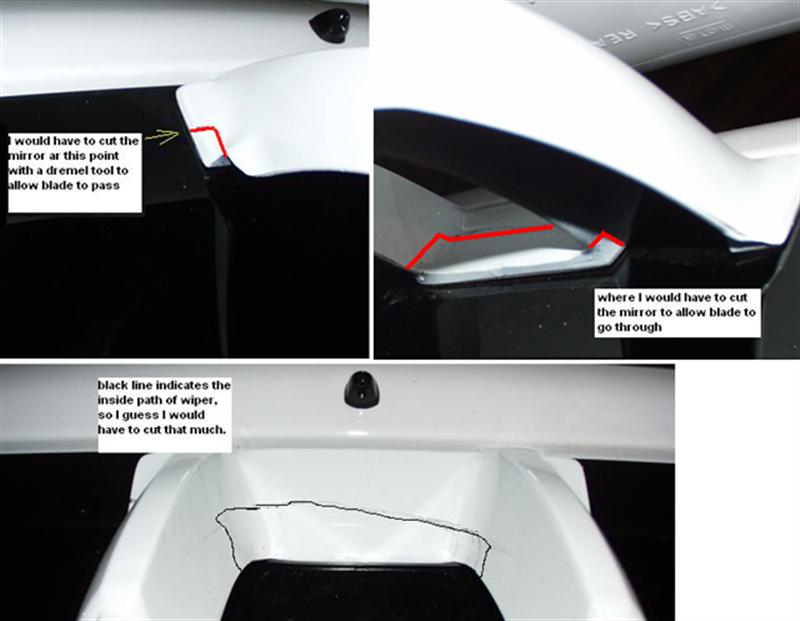
Observing the path of the
wiper, I noticed that I would have to cut too much of the Hatch Mirror,
making it not as secure and totally ugly to look at.
(SEE PIC # 32)
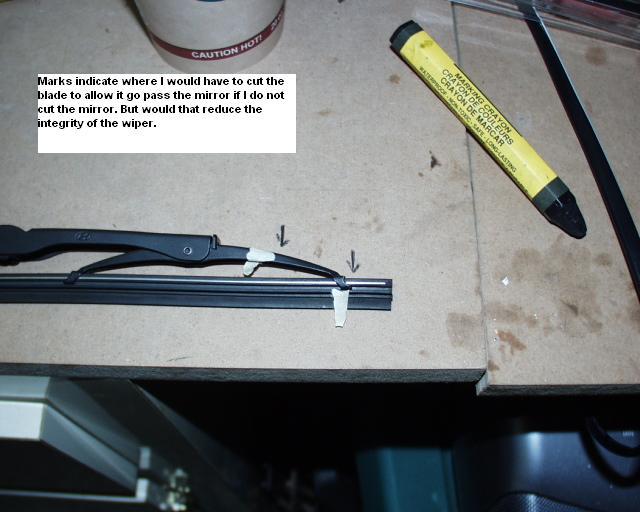
Therefore I concentrated
on the wiper itself. I can either cut the wiper down temporary or get a
smaller wiper. Pic 33 shows where I would have to cut the wiper.
(SEE PIC # 33)
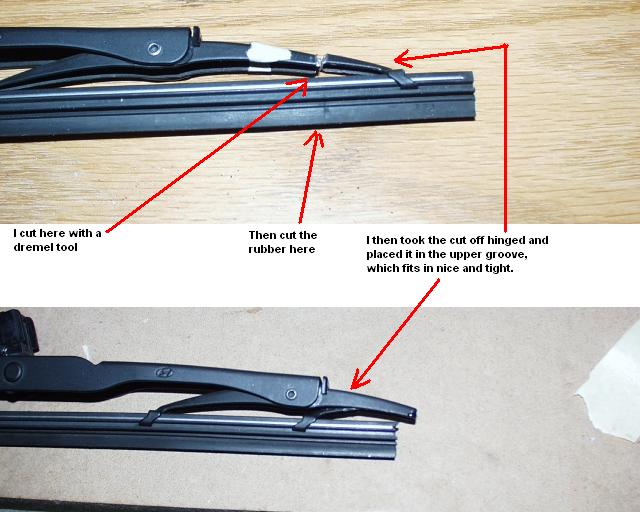
I decided to cut the wiper
down temporary until I get the smaller one. I cut the wiper metal arm with a
dremel tool about 1 and a half inches from the edge. Then inverted the hinge
to fit underneath the arm in the groove. It actually fit in very nice and
tight.
(SEE PIC # 34)
I placed the temporary
modified wiper on the wiper arm and tested it. It worked and pass through
without any problems or damaged to the window or the Hatch Mirror.
(SEE PIC # 35)
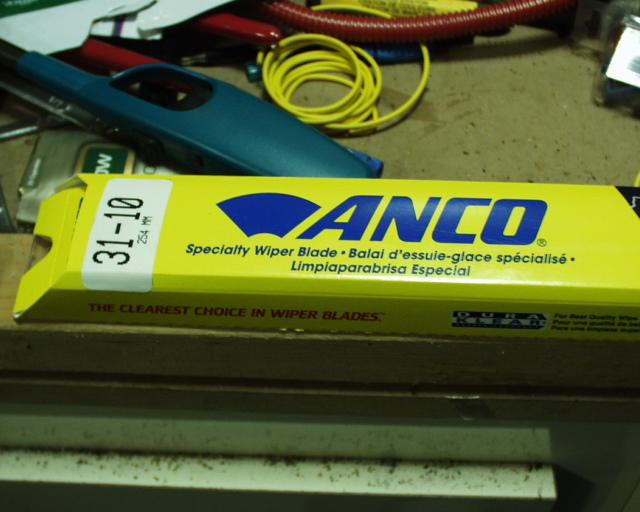
I took off the temporary
wiper and took some measurements and decided I can get an actual wiper in
the correct length. 10-11 inches. Fellow member Rib told me of the wipers
made for older Volkswagon Beetles in that length and I purchased one. This
is the package it came in. I ordered it through
www.RainWipers.com ANCO 31-Series Blade for $10.00.
(SEE PIC # 36)
I tested it and it works
great and now the mod is a total success.
(SEE PIC # 37)