
The Hyundai Santa Fe Headlight Buzzer Installation
| Original idea: | THC member Sonatava (Tom Gull) |
| Author of Mod / Report: | Tom Gull and twospirits(additional text) |
| Enhancements: | twospirits |
| Installers / Testers: | Numerous Santa Fe Owners |
| Parts Supplier: | Radio Shack or Walmart |
| Images provided by: | Tom Gull, twospirits |
Introduction / History
| There are vehicles out on the market that do not allow their headlights to be on without the key in the ignition. The Hyundai Santa Fe's headlights do go off when the key is off and the door opened. However the parking lights are able to be turned back on by turning the headlight switch back on, without any warning. This install changes this, by installing either the 3M Headlight Reminder buzzer mentioned in this install or a Radio Shack buzzer / chime wired to the fuse box, the buzzer will buzz (or if you get the chime, will chime) letting you know when you leave the lights on. thereby saving you from draining your battery. Special thanks go out to the originator of this install, The Hyundai Connection member Sonatava (Mr. Tom Gull). |
|
Disclaimer
|
Difficulty level / scale: On a scale of 1 - 10
| Easy | Difficult |
| 1 | 2 | 3 | 4 | 5 | 6 | 7 | 8 | 9 | 10 |
| X |
Tools and materials needed:
| 3M Headlight Buzzer kit (available at Walmart for $7) |
| or Radio Shack #273-071B Electronic Chime |
| Needle-nosed pliers |
| Optional: |
| Sandpaper or Emory board |
| Double sided stick tape |
Time to install item:
| Total time for mod: | 10-30 min |
Source, item and packaging
 |
The original instruction from Tom Gull mentions that you can perform this modification using the 3M Headlight Buzzer Kit (about $7) from any Walmart store. I tried locating one and could not find it. I did find it at 3Ms' website and its actually called 3M Headlights Left-on Reminder #03796. | |
 |
Upon searching the web it is also packaged under the same name and sold by Liteminder.com for $5.95 | |
 |
Then there is the Radio Shack Electronic Chime #273-071B for $9.99 which is used in this modification and much easier to obtain. |
Step 1: Headlight / Parking Buzzer Installation.
 |
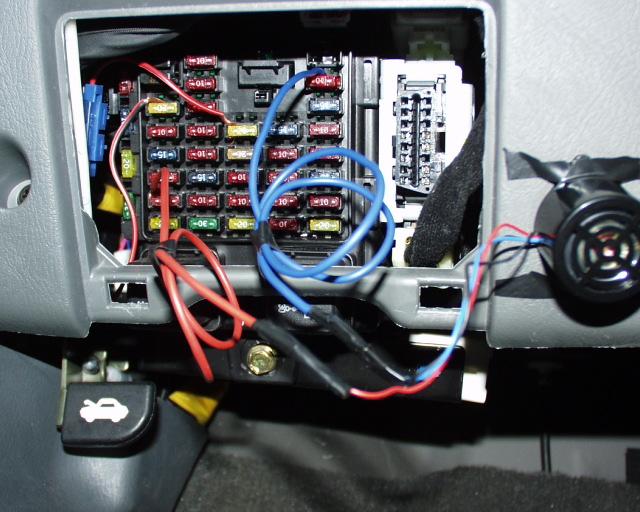
Adjust the front drivers seat to its farthest position and raise the Steering wheel to the utmost position. This will allow you to be more comfortable while doing this procedure. Now remove the fuse panel cover beneath the steering column so that you have access to the fuse box. | |
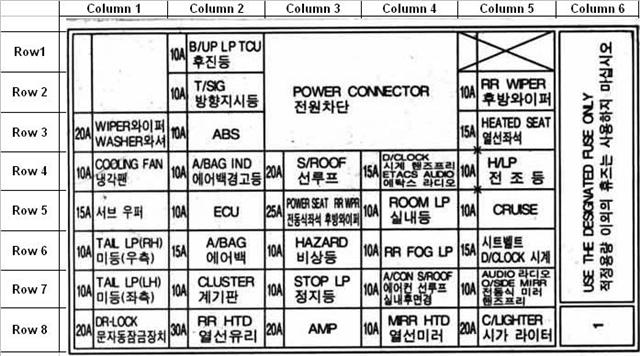 |
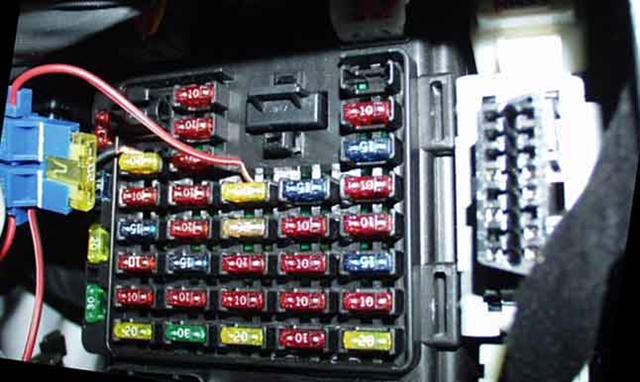
Familiarize yourself with the position of the fuses within the box. The panel you removed in the previous step has the locations and names of the fuses. Looking at both the fuse box and the diagram it looks like the fuses are positioned in a grid like structure. For purposes of this installation we will use this grid like system (Rows and columns) to indicate where the fuses are. Row 1 will be the top row, Row 2 will be the one under that and so forth. As well as for the columns. Column 1 will be the left most one. | |
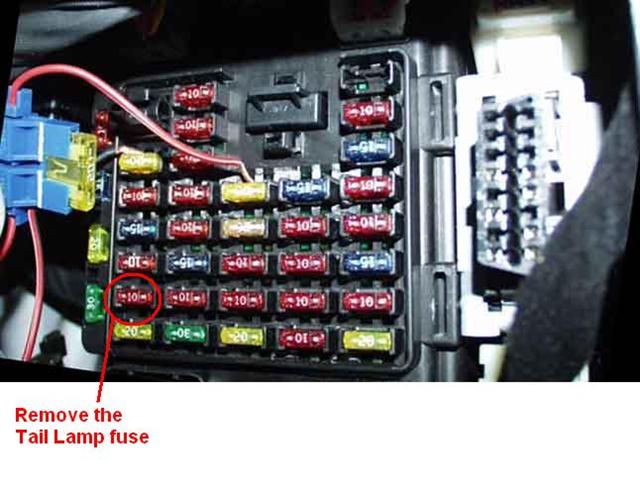 |
Locate the
fuse in Row 7 Column 1 (Should be the 10amp Tail Lamp fuse) and remove it.
Using sandpaper or an Emory board polish the blades of the fuse as well as the mini taps from the buzzer wire (red) to make them a bit thinner. (This allows it to go back in the fuse box easier.) |
|
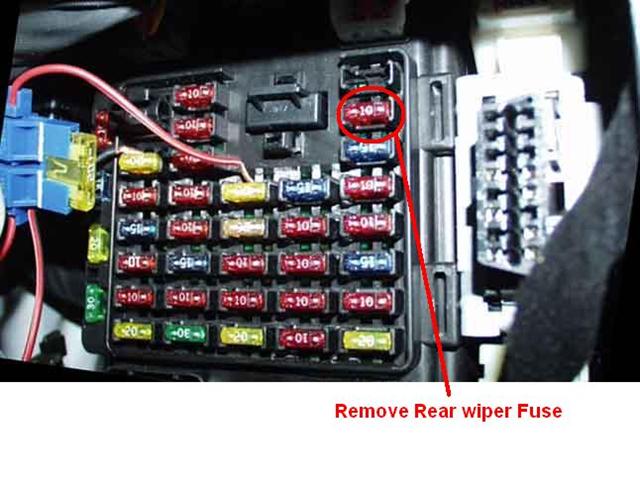 |
Locate the
fuse in Row 2 column 5 (Should be the 10amp Rear Wiper fuse) and remove it
as well. Do the same step above using the sandpaper or an Emory board and
polish the blades of the fuse and the mini-tap of the white wire from the
buzzer.
|
|
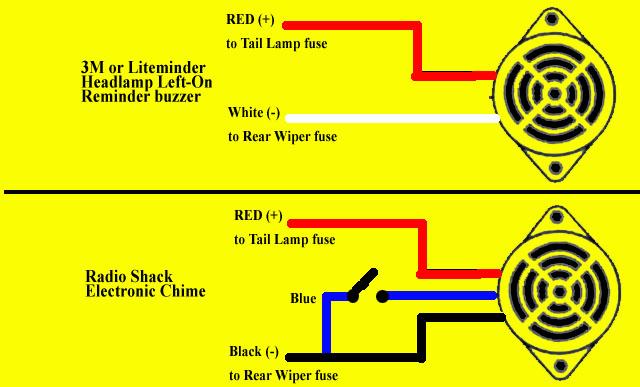 |
The 3M /
Liteminder buzzers have only two wires, a red (+) and a white (-)one. The Radio Shack Chime has three wires, a Red (+), a Black (-) and a Blue wire. For the Radio Shack chime you will connect both the black and blue wires together. |
|
 |
If you are
using the 3M (Walmart or LiteMinder kit) perform the following 2 procedures. Place the red
wire from the buzzer onto the Tail lamp fuse using a needle nose pliers
re-insert this new fuse/tap combo back into the fuse box. (Into the fuse
opening in Row 2 column 1). |
|
 |
If you are
using the Radio Shack chime perform the following procedure. Place the red wire from the buzzer onto the Tail lamp fuse using a needle nose pliers re-insert this new fuse/tap combo back into the fuse box. (Into the fuse opening in Row 2 column 1). Place the Blue and Black wire together and then attach the wire to the Rear Wiper fuse (in Row 7, column 5 ) using a needle nose pliers. Make sure it is making contact with the metal in the slot. |
|
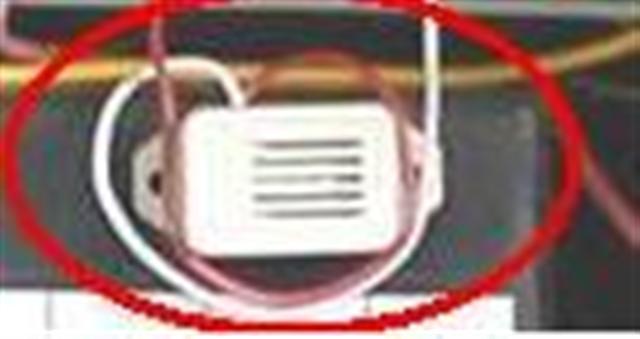
| Place double-side tape to the back of the buzzer and stick it in an area
close by, this prevents it from hanging. Test the new headlight buzzer by
turning the vehicle on and turning your headlights/parking lights on. Then
with the headlights/parking lights still on turn the key off and the buzzer
should sound. Now turn the lights off (with the key still off) and the
buzzer should stop. Replace the fuse box panel cover. |
||
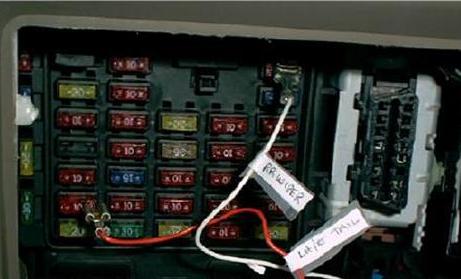
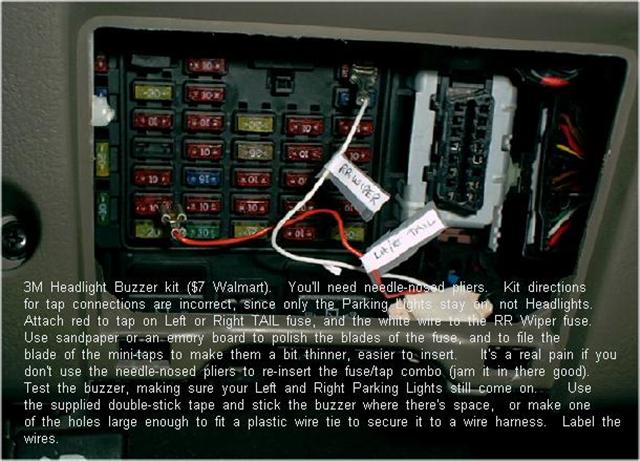
| Original photo and instructions by Tom Gull shown below. | ||
This site was last updated 02/08/06