The
Santa Fe has numerous aftermarket and OEM parts that are not readily
available for purchase here in the United States. Some of these items can be
purchased from 3rd party suppliers outside the Dealership network. Once such
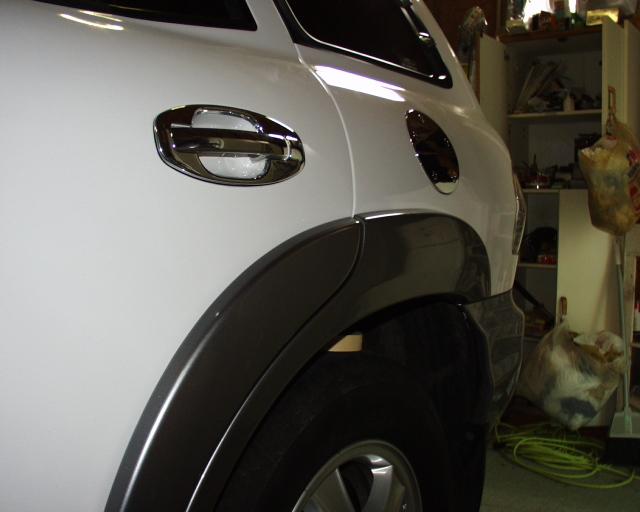
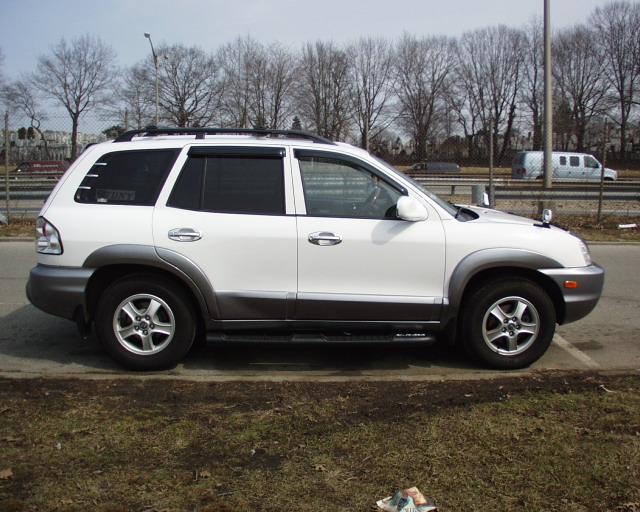
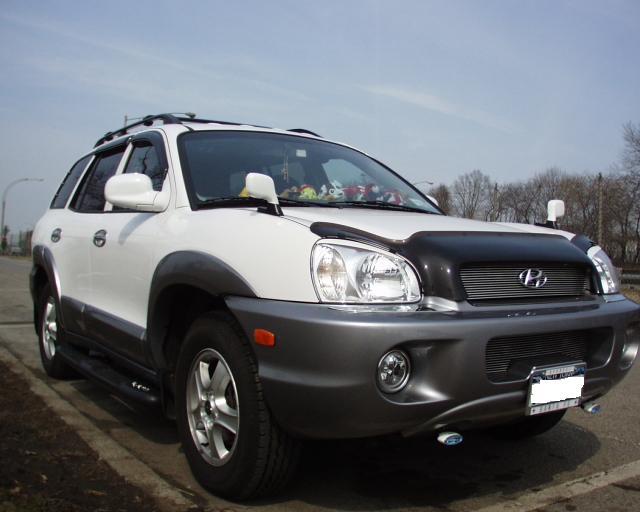
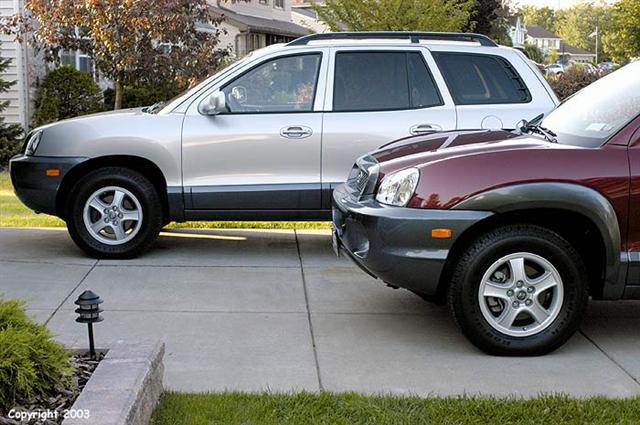
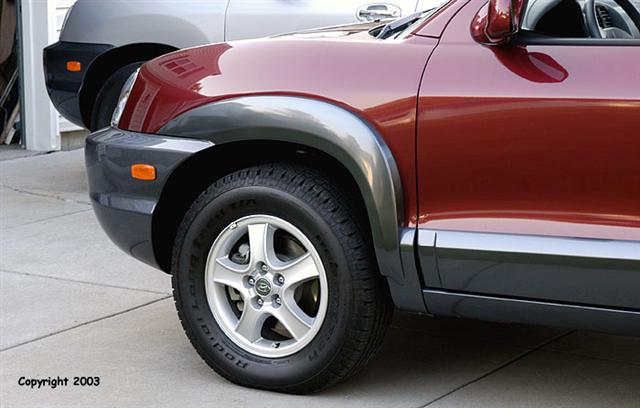
product is the Fender Flares. It is a genuine Hyundai Motor
Corporation part manufactured by Hyundai Mobis. These Fender Flares give the
Santa FE a new distinctive look as well as provide additional protection to
the body sides from debris and the environments. This step by step
instruction is my attempted to replace the original instruction
sheet that is supplied by the manufacturer which is in Korean. This is the reason why I
created this install guide, to make it easier for others plus saving
to have someone install it for you.
Note: 3
out of 10 (with two people), 5 out of 10 (doing it
yourself)
Tools and materials needed:
The Kit was
shipped and packaged very well and all the items were accounted for.
The kit
consists of the following items...
Item
Qty
01)
Wheel Flare Assembly
Rear
1
Left
1
Right
02)
Wheel Flare Assembly
Door
1
Left
1
Right
03)
Wheel Flare Assembly
Front
1
Left
1
Right
04)
Clips
12
05)
Instruction Manual
(Korean)
1
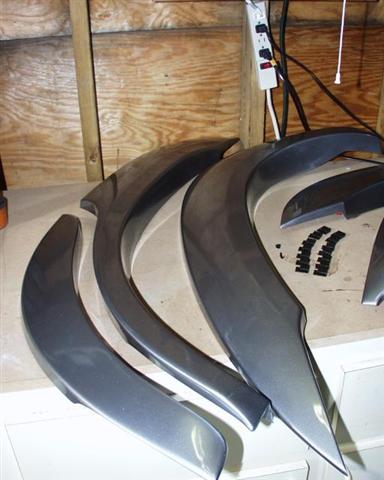
Door and Rear Flares out
of the box. Also shown are the clips.
Front Fenders with clips.
Main items
TFR Racing SFE015 OEM Fender Flare Kit
(see above)
Isopropyl Alcohol
Clean Rag
Optional
Masking Tape
Heat gun or hair dryer
Time to install item:
Total time for mod:
60-120
min
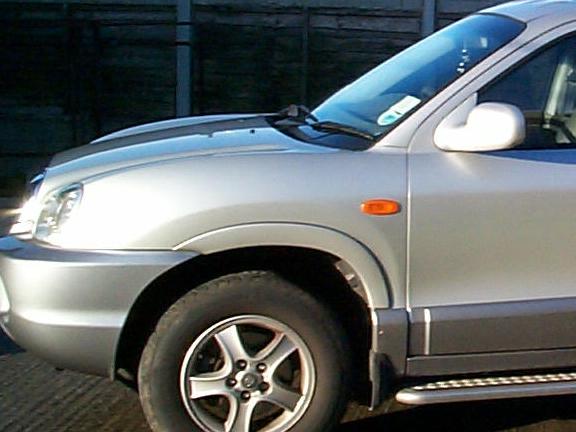
Step 1:
Preparing
the Santa Fe.
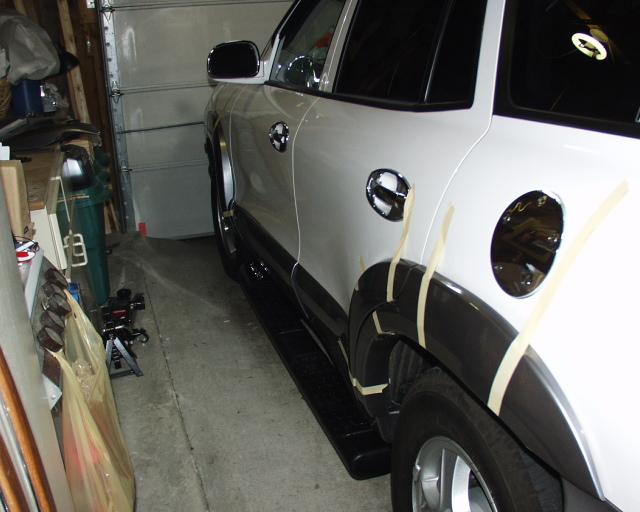
Using masking tape, set
the Fender Flares onto the Santa Fe so you can see where they are going to
be placed. They should follow the outlined on the fenders.
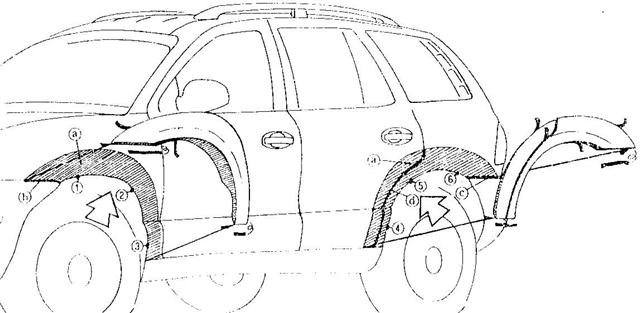
Refer
to the diagram below for the following set of instructions. Clicking on the
diagram opens up a new window with the diagram at full size.
If the Santa Fe
is not in a warm enough area (75-95 degrees), you will need to warm up the
places where the Fender Flares are going to be attached by using a heat gun
or a hair dryer. Do not place the heat gun or hair dryer too close to the
vehicle or you will cause damage to the area.
Remove the Flares and prep
the areas (a, b, c, d) with isopropyl alcohol. Let it dry.
Make sure you do this at a room temperature of 75-95 degrees.Peel
off the tape backings on the double sided tapes, and apply the front fender
flares along the appropriate line ("a-b" shown above).
Make sure the flares is attached firmly on
the vehicle. Do the same for the other side.
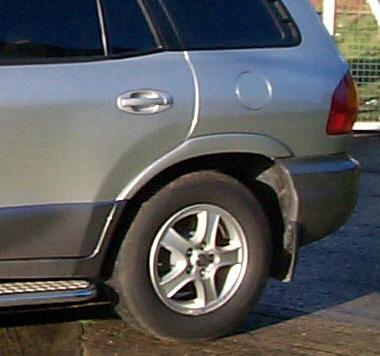
Perform the
same procedure on the rear fender.
Peel off the tape backings on the double sided tapes, and apply the rear
fender flares along the appropriate line ("c-d" shown above).
Make sure the flares is attached firmly on
the vehicle. Do the same for the other side.
Perform the same procedure on the Door
fender. Align it to the rear fender.
Apply the clips
on the areas shown on the diagram represented by numbers (1-6) in the
diagram above. Perform the step on the other side.
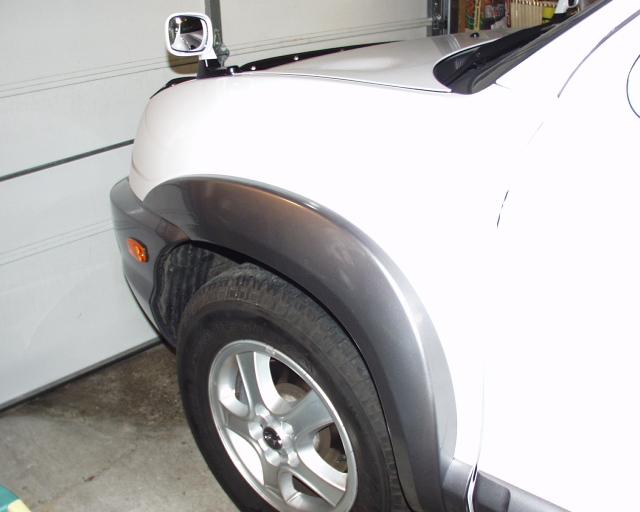
Now go out and
try not to grin when others Santy Owners see your newly enhanced model.