The Hyundai Santa Console Lights Modification
| Original idea: | Spawn |
| Author of procedures: | Spawn |
| Installer / Testers: | Numerous |
| Parts Supplier: | ebay |
| Images provided by: | Spawn, twospirits |
Introduction / History
| Inspired by the original Santy Blue/Door Control modification, this modification adds LED lights to the Console area. Specifically the storage space under the stereo and the change tray under the ashtray. |
|
Disclaimer
|
Difficulty level / scale: On a scale of 1 - 10
| Easy | Difficult |
| 1 | 2 | 3 | 4 | 5 | 6 | 7 | 8 | 9 | 10 |
| X |
Tools and materials needed:
| 4 LED's of your
colour choice, with resistors to use with 12V power (check ebay) 20-22 gauge wire you want as long as there are 2 wires in the strand (one for +, one for -) 3 HDD power wire "Y" adaptors (for pc's) |
| Tap-in Wire connectors |
| soldering skills and tools |
| Drill |
| Optional: |
| Patience |
Step 1: Remove the Center Console panels.
(Click on images to open up in
full size) |
The first step is to get
the two pieces of the centre console out. |
(Click on images to open up in
full size) |
Next, remove the 2 screws
from the bottom of the second part of the console, and just pull it straight
towards you gently and disconnect all of the cables from the fog lights,
hazard lights, clock and defrost. Now you have your second piece. |
|
(Click on images to open up in
full size) |
|
Step 2: Modifying the Y adapters and LEDs.
(Click on image to open up in full size)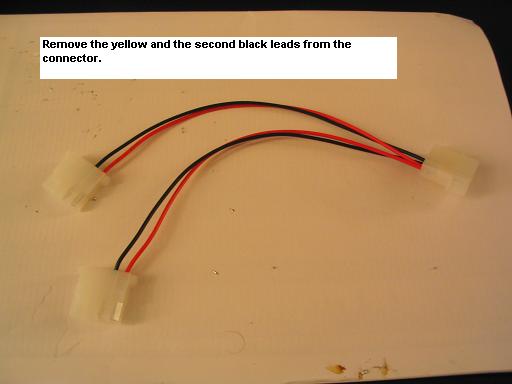 |
You are going to have to do some prep work on
the Y adaptors. If you look at the pins, either male or female, the pins are
held in by a piece sticking further out the side of the pin. Basically a
backstop. You will be removing the yellow wire and one of the black wires.
Using a pushpin/thumbtack, gently push the piece into the pin on both sides.
Save the leads that you remove, you will be using them later. You should now be left with 3 of them (see image). Put one aside the way it is. Now cut the 2 female ends on each of the remaining adaptors off (so you should have removed 4 in total). Basically what you jut done is created a custom wire harness, and this can be developed for any application you want to use. |
(Click on image to open up in full size) |
Now for the soldering part. Take your LED and a resistor. You will be attaching the resistor to the Anode of the LED, which is also the + lead. |
(Click on image to open up in full size)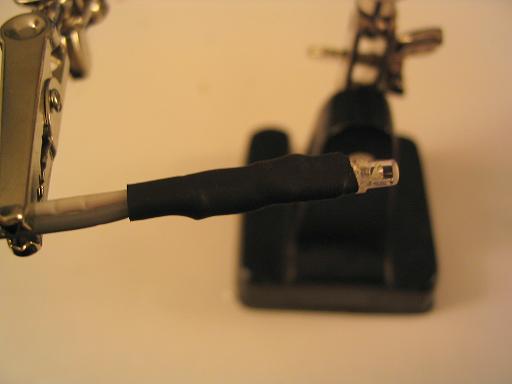 |
Once you have the LED and resistor together, attach wire leads to them of sufficient length (about 3-4 inches). Put some heat shrink tubing around the leads and you should have this (I dremel the end of the LED flat to act as a diffuser) You will need to make 4 LED/Resistors with leads. |
(Click on image to open up in full size)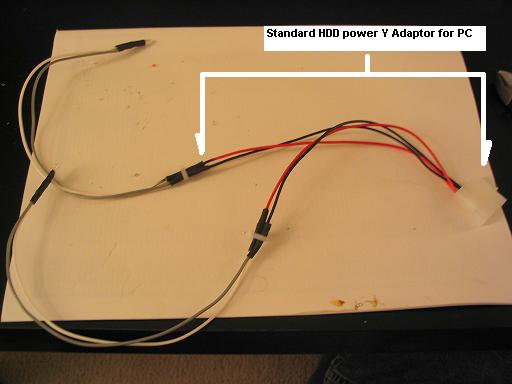 |
Now attach the ends of you LED leads to the bare
ends of one side the Y adaptor (making sure that you remember which is + and
which is -. Easy tip, black/grey should always be -, colors should be +. Note: Easy way to test if they are working, open up your pc and plug them into one of the power cords. Make the second set longer as they will be going into the upper part of the console, my leads were about 12-15 inches long. |
(Click on image to open up in full size)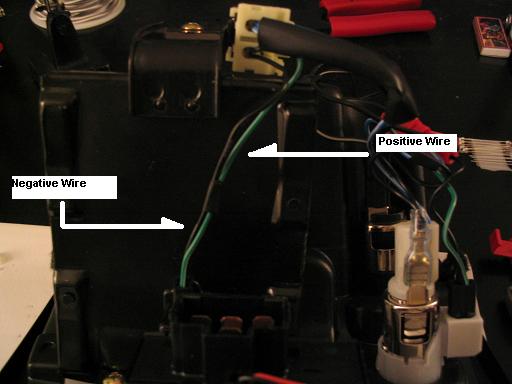 |
Let's start with the basics here. Take the AC Controls, you will be drawing power from the wires that power up the bulb in the ashtray. I have marked which one is + and which is - to make things easy. Green is +, black is -. |
(Click on image to open up in full size) |
Remember those bare leads I told you to keep,
get a yellow and a black one. Using the Tap-in Connectors, attach the yellow
lead to the + wire and the black to the negative wire. There is the second part of your harness. |
Step 3: Placement of the LEDs.
Click on image to open up in full size)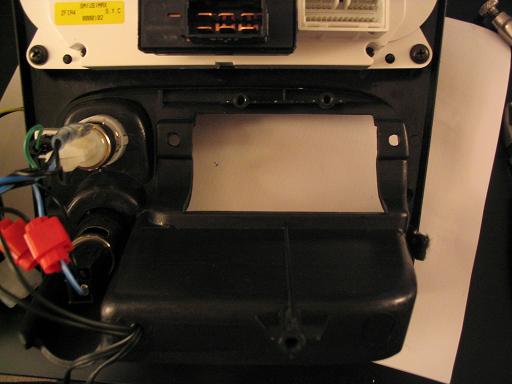 |
Now to place the LED's... Remove the metal bracket that holds the ashtray so you have an unobstructed area. (disregard the extra wires coming out of the bottom, you won't need them, they are for the control box for my dash neon's) |
(Click on image to open up in full size)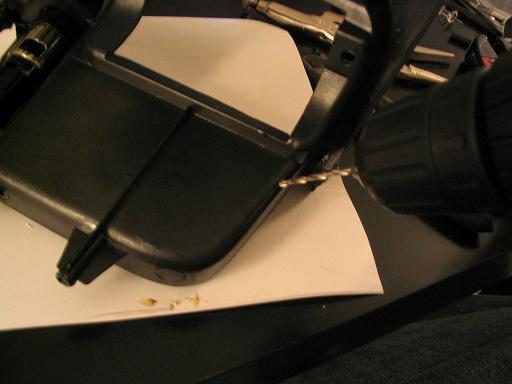 |
I placed my LEDs on the same side, all you have to do is drill inwards at about a 45 degree angle to make the mounting hole for your LED. |
Click on image to open up in full size)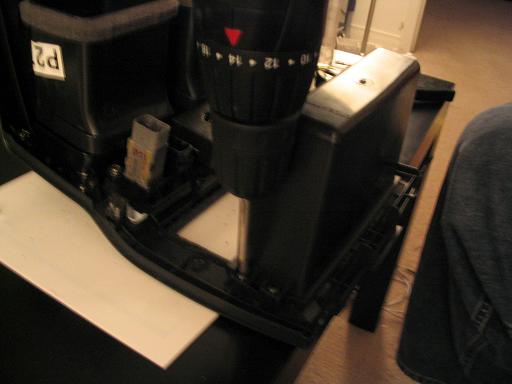 |
Wedge your LED's in the hole and throw in some
hot glue for good measure. You should bend your leads so that they lie flat
and are not in the way of anything. You are finished with that part of the console, time for the second part. Remove the tray by taking out the four screws holding it in. |
(Click on image to open up in full size)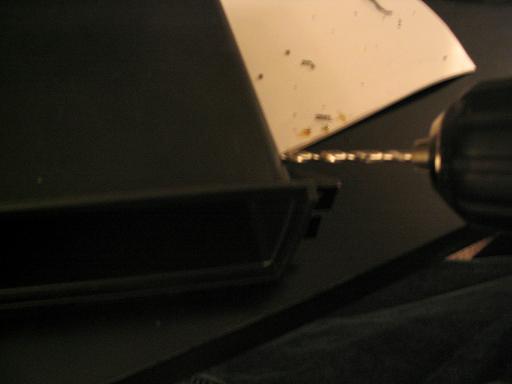 |
Same drilling as with the lower part of the console, 45 degree down angle (and towards the back, trust me). |
Click on image to open up in full size)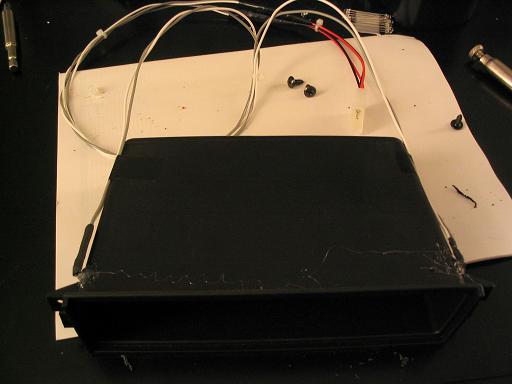 |
Do one on each side, glue the LEDs in and tape
your leads to the tray to help control the wires. Now you are really done, put everything back together, plugging all the harnesses back in. Reassembly is just the reverse. Do be careful when you put the lower part back in that none of your new wires are dangling under the ashtray, just tuck them inside the console before you push it back in into place. |
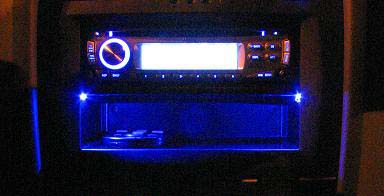
Final Views: (Click on image to open up in full size)
 |
I am more than likely going to be moving the LED's farther back in the upper part as they tend to illuminate a lot of the cabin as well (that is the 2 blue lines you see on the console to the right and left of the opening. |
This site was last updated 02/08/06