The Hyundai
Santa Fe Cabin Air
Filter Installation
(US Version-2007+ Models)
| Original idea: | HMC |
| Author of Mod / Report: | twospirits |
| Installers / Testers: | Numerous Santa Fe Owners |
| Parts Supplier: | Hyundai Motor Company |
| Images provided by: | twospirits |
Introduction / History
|
The Hyundai Santa Fe's that are sold outside the United States are equipped
with a Pollen Cabin Air Filter that filters out any odors and particles
leading to the fan/air conditioning unit ducts. This modification addresses
this oversight by installing a genuine Hyundai or aftermarket air filter into the empty
filter housing for US Models. The OEM filter is one that is made for the
Hyundai Sonata but fits into the same housing of the Santa Fe. Performing
this modification yourself will save you the cost if US Dealerships were to do it. |
|
Disclaimer
|
Difficulty level / scale: On a scale of 1 - 10
| Easy | Difficult |
| 1 | 2 | 3 | 4 | 5 | 6 | 7 | 8 | 9 | 10 |
| X |
Tools and materials needed:
| Needle Nose Pliers |
| Electrical Tape |
| Hyundai Santa Fe cabin air filter |
Time to install item:
| Total time for mod: | 10-15 min |
Source, item and packaging
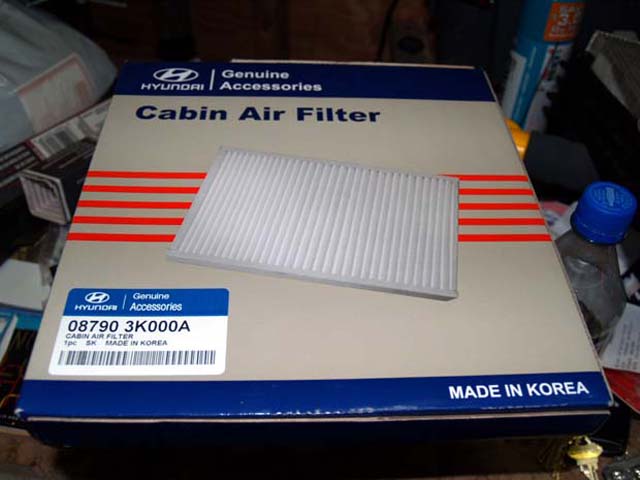 |
The Cabin Air Filter needed
for this modification is a genuine Hyundai OEM part made for the Hyundai
Sonata.
The part number for the Cabin
Air Filter is as follows... These filters can be obtained at any Hyundai dealership, even cheaper if purchased online. Note: This filter is listed for the Hyundai Sonata within the Hyundai Parts database, but can be also used on the Hyundai Santa Fe, Sonata, Azera as well as the Kia.Optima/Magenta/Lotze. |
|
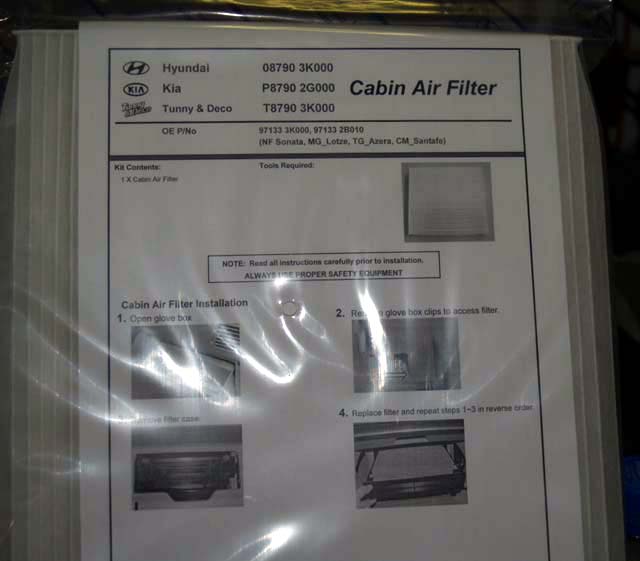 |
The filter is enclosed in a plastic bag with an instruction sheet on how to install it. | |
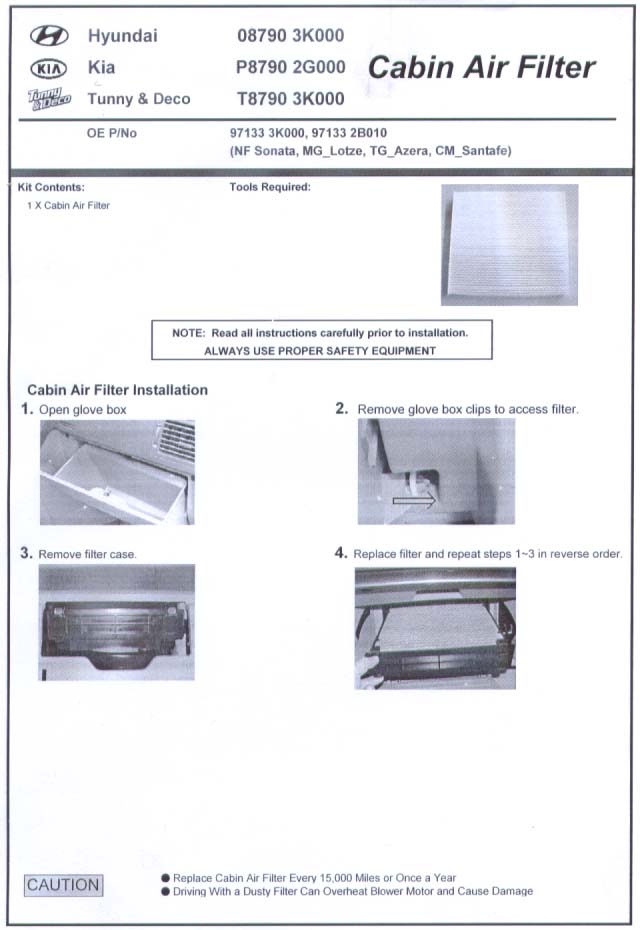 |
This instruction sheet is very limited in its detail and basically useless for a Santa Fe install. It was clearly made for a Sonata install. |
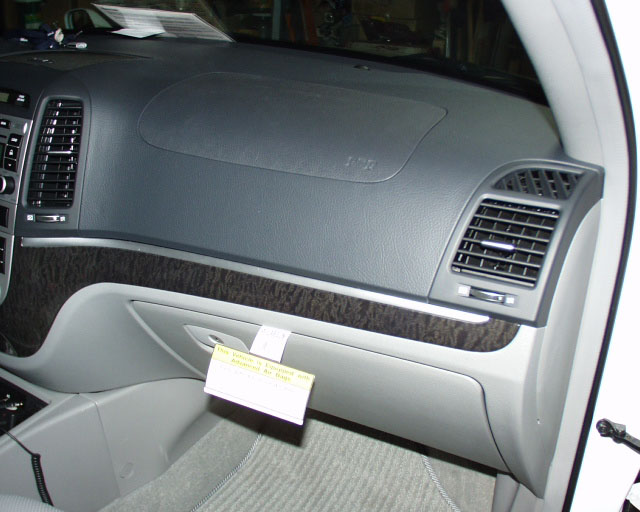
Step 1: Accessing the Cabin Air Filter Housing
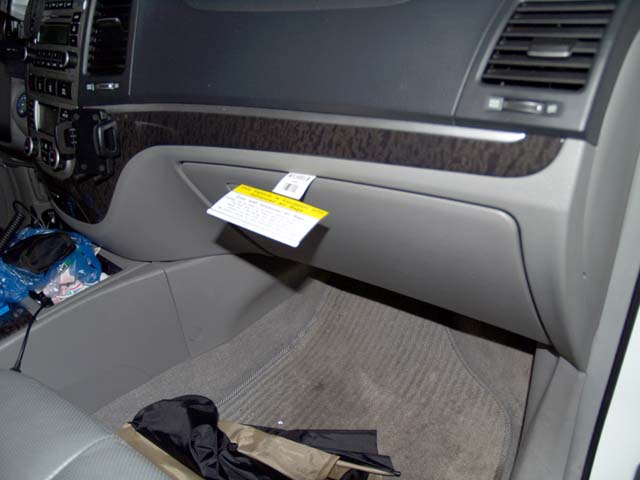 |
The Cabin Air
Filter housing is located behind the Glove Box. The Glove Box needs to be
temporarily detached to gain access to the cabin air filter housing. |
|
 |
Open the front passenger door all the way and
empty out anything within it.
|
|
 |
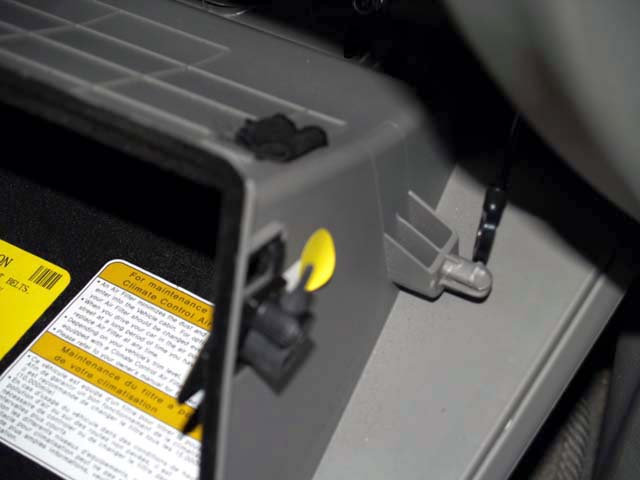
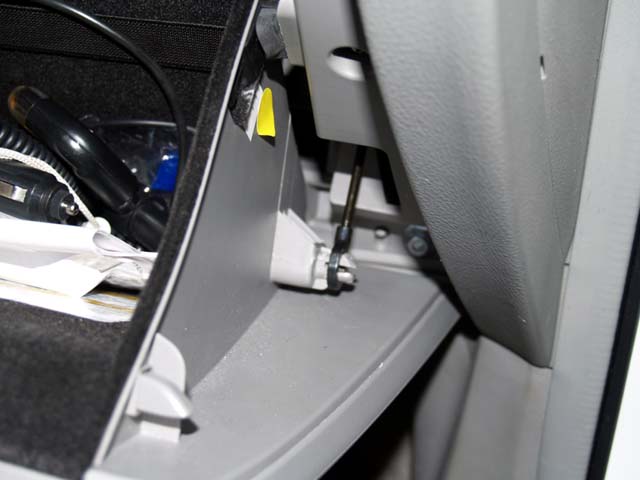
The glove box is held by two glider clips and a cable holder. To the right of the glove box side molding is the cable holding which holds the glove box from going down too far. | |
 |
First, you
will need to detach the cable from the glove box. Using a needle nose pliers gently squeeze the moldings anchor tip together so the cable can be pushed outward. Note: it is best if the pliers are wrapped with electrical tape so the pliers grooves do not scar the molding. |
|
 |
Next, you
will need to take the glove box off its gliders. Gently push the inner part of the glove box (glide clips) toward each other and the glove box should detach from the dashboard. |
|
 |
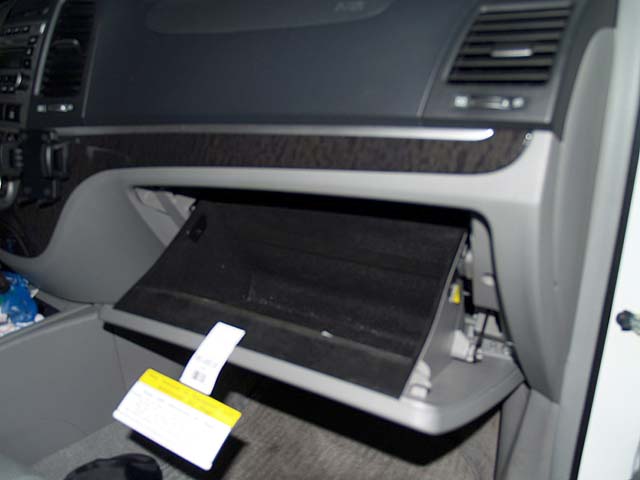
After the cable and the glide clips have been removed, the glove box should drop down and provide you will better access to the filter housing. | |
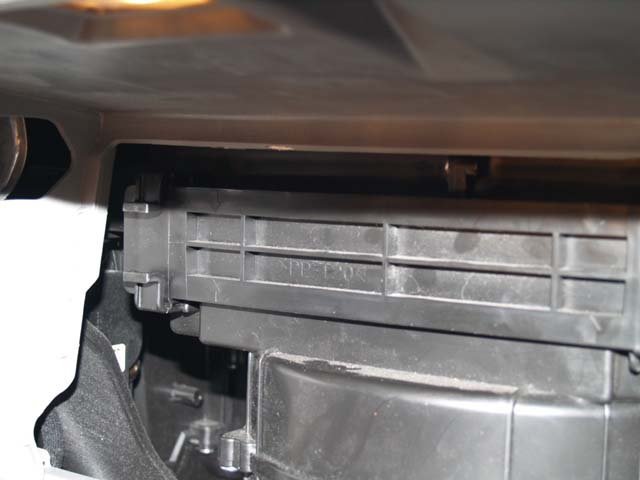 |
With the glove box fully extended and out of the way, you can see the 4 clips that attach the filter housing to the blower unit.
|
|
Step 2: Remove existing filter
 |
You will need to squeeze the 4 clips toward each other and then towards you in order to remove the filter. CAUTION: DO NOT pull on the clips toward you only, or you will break them off. (I learned the hard way and now only have two (left side) clips holding the filter housing since I broke them off).
|
|
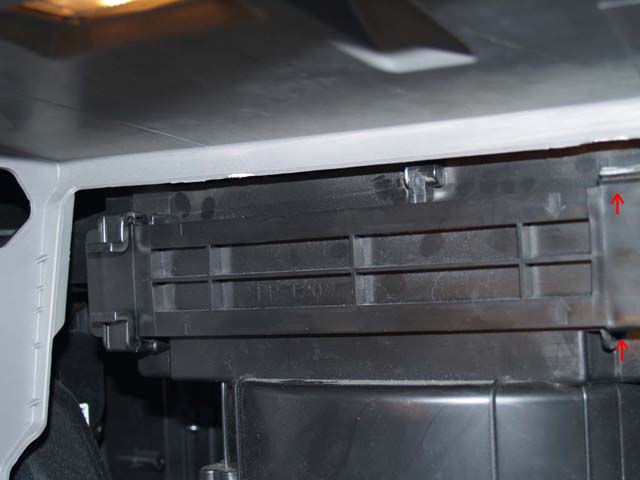 |
This is the look of my filter housing with the broken clips by not following step two above correctly. | |
 |
This is the
look of my filter in its housing after taking it out.
Just remove the old filter from its housing. Note: |
|
Step 4: Comparing filters
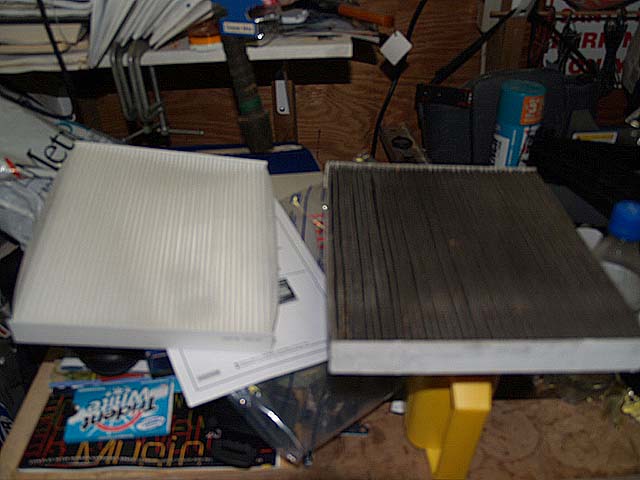 |
Comparing the
old one against the new one is like night and day. Yuck. |
|
Step 4: Attaching the new Cabin Air Filter.
 |
This picture shows the filter cover housing with the filter in it. | |
 |
Take your new filter and inserted into the housing. The best way is to squeeze the filter in the middle and it enters the housing without getting obstructed from the housings clips. | |
Step 5: Reinstall all parts.
|
|
Re-insert the filter housing back into the blower unit making sure you hear the clips snap back into place.
|
|
 |
Re-attach the glove box cable to the glove box. | |
|
|
Re-attach the glove box clips onto the gliders. | |
Warranty notes:
|
Most US Dealerships will replace the cabin air filter for Santa Fe 2007 and
+ models, since they are now included with the vehicle. Previous ones do
not. Enjoy your fresh cabin air. |
Additional notes and Part Numbers:
MY = model year
Santa Fe
2001 - 2003 MY: 97619-38100 (before
March 29th, 2003)
2003 - 2006 MY: 97619-3D000 (after March 29th, 2003)
2007 - present :
08790-3K000A
This site was last updated 03/08/08