Hyundai Santa Fe Billet Grille Installation / Report
| Original idea: | Some designer in Korea |
| Author of report: | twospirits |
| Enhancements: | Numerous members |
| Installers / Testers: | Numerous Santa Fe Owners |
| Parts Supplier: | Ebay |
| Images provided by: | twospirits, Ebay auctioneer |
Introduction / History
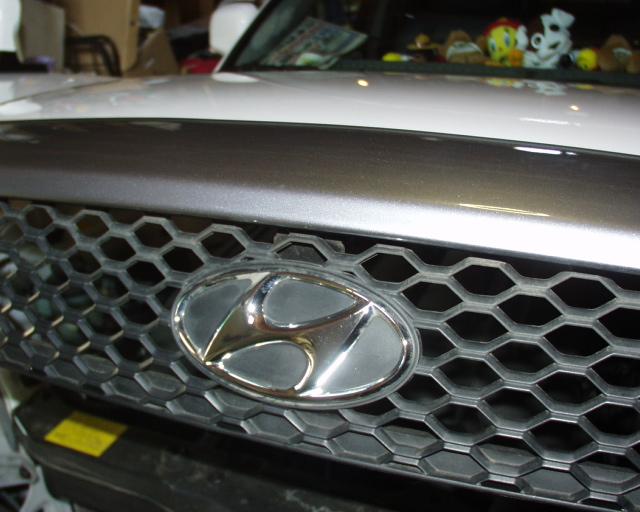
| The Santa Fe has a distinctive look to it unlike other vehicles on the market. One of its unique features is the appearance of the grille. From afar the grille looks like its bathe in a black mesh, while up close one is able to see the grilles' true styling. Some like it, some don't. Its basically a plastic honeycomb wire design that can I can only describe as looking through a chicken wire fence. Some members have created unique and interesting ways of masking this unstylish grille. One of these methods is described here, it shows how to change the appearance of the grille to a more stylish one by buying an aftermarket grille such as the one that is constantly sold on Ebay and other places.. | . | Pic 01 - Original Grille |
|
|
Disclaimer
| Please Read the disclaimer before proceeding |
Difficulty level / scale: On a scale of 1 - 10
| Easy | Difficult |
| 1 | 2 | 3 | 4 | 5 | 6 | 7 | 8 | 9 | 10 |
| X Top grille |
X lower grille |
Tools and materials needed:
| Ratchet wrench |
| Wire Cutter or utility knife |
| Grease marker |
| Aftermarket Billet grille sold on Ebay. (which includes 8 black nylon tie straps) |
| Optional: |
| Hex key (to remove Hood Deflector if you have one.) |
Times to install aftermarket item:
| Installing upper level: | 05-10 minutes |
| Installing lower level: | 25-50 minutes |
| Total time for install: | 30-60 minutes |
| Note: If you have a hood deflector the time to install the upper level increases by another 5-10 minutes. | |
Source and item
| Pic 02 - The Actual Grille | |
: |
The original Billet Grille is a two piece item that is cast aluminum painted black with the front edge buffed shiny to resemble chrome. Each piece is actually 2 pieces held together by 4- 1 inch square metal block pegs. One of the pieces goes on the top part of the stock grille, while the other goes on the bottom level. The item can be purchased currently on Ebay and may be offered by a company in the future. |
Packaging
| : |
The item I bought on Ebay was
shipped from California and it came in a sturdy well protected package.
Shipping was rather quick and there was no visible damage to the item. The
instructions that came with the Billet Grille contained just two lines and
they are.. "1)Hold the Grille in Place" and "2)Using the black nylon tie strips, tie the billet grille to the honey comb grille." I can guarantee you there is more to this operation than just those two lines as we shall see below. |
Pre-Installation
This section is for those
owners that also have the plastic Hood Protector.
If you do not have one on your Santa Fe you can proceed to the next section
below titled "Installation"
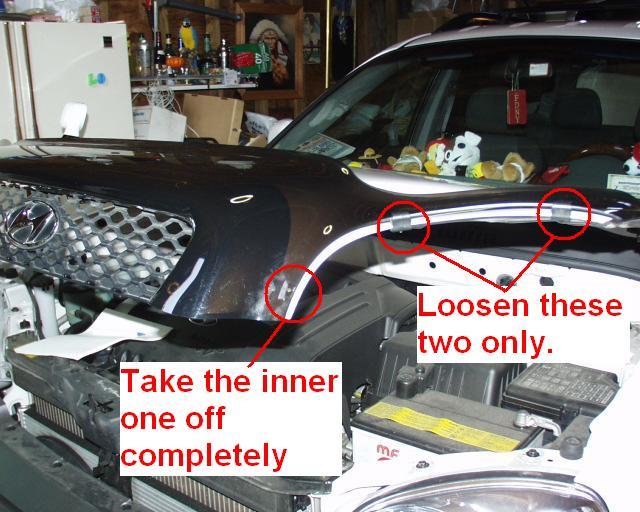
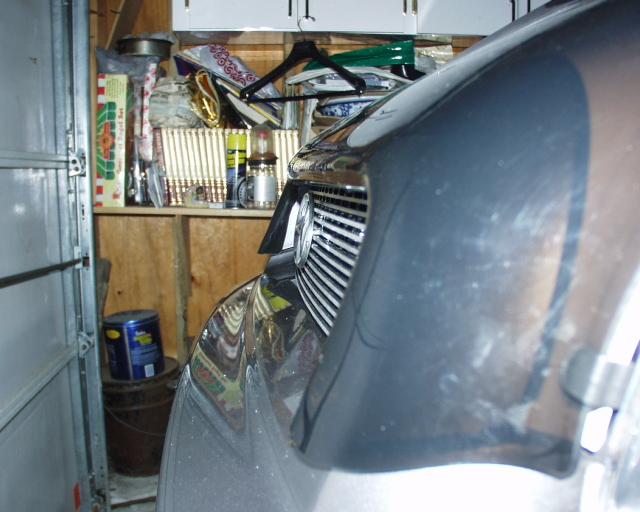
| Pic 03- Removing the Hood Deflector | |
 : : |
if you have one of those
plastic Hood Protectors on your Santa Fe you will need to temporary take it
off to get the upper lever Billet Grille on. While it may be possible to
forcefully place the Billet Grille into position with the Hood Deflector
still on it, but it will not be easy and most likely scratch it. Therefore I
would suggest you take it off. Start by loosening (not removing) the two outer pegs on each side of the deflector with a hex key. Then you will take off the inner pegs on each side completely and put them to the side. This will allow you to gently slide the Hood Deflector towards you and it will come off. (You may want to clean the area at this point in time). |
Installation of the Billet Grille - Top Level
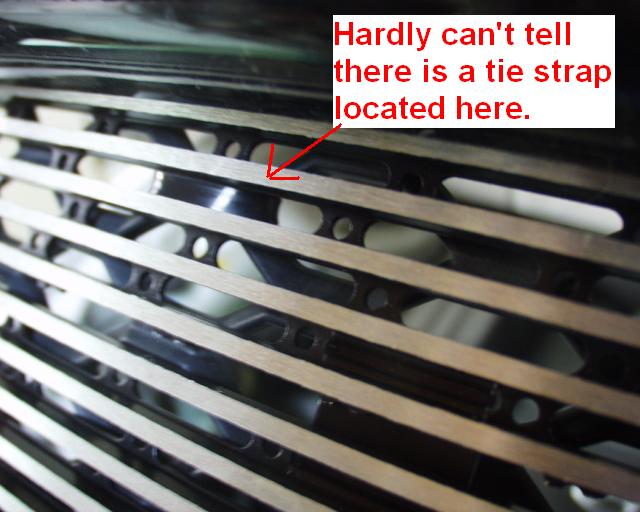
| Pic 04- Tie strap on Grill | |
 |
With the Hood Deflector off
(if you had one on) you now have a clear unobtrusive view of the actual
grill and the Hyundai "H" logo emblem. You will need to take this emblem off by unscrewing it from behind the stock grille. Place the top level Billet Grille onto the stock one and with a nylon strap fish it from behind the grille towards you. You will then wrap the strap back and fish it through its hook and secure it. make sure that you do not fish it over the chrome lines. (It will disrupt the smoothness of the design, see pic 4.) Do this 3 more times in the areas you feel more comfortable. (I chose near each corner about two inches inward.) |
| Pic 05- Side view of newly installed Billet Grille - Top level. | |
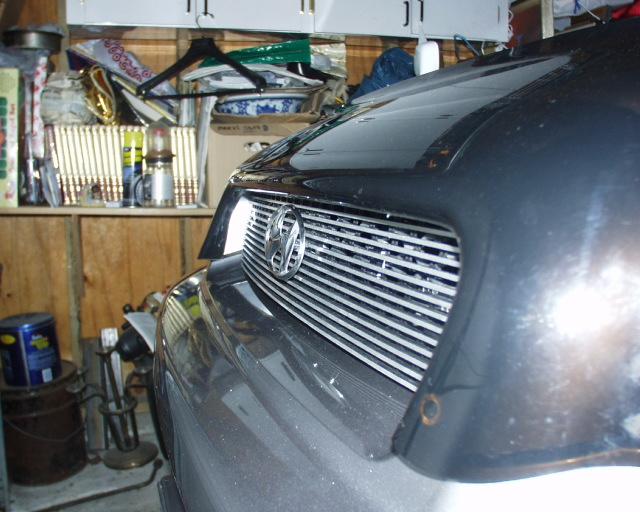 |
At this point you can put
back the Hood Deflector if you had one and which you took off as mention in
the "Pre-Installation" steps above. Just do the steps in reverse and it
should go on with no problem. One word of caution: Do not over screw the pegs of the Hood Deflector, cause the little hex screw inside the pegs is not suppose to be screwed all the way through. Only screw till you see the screw go about 1/8th of a inch into the peg. By over screwing it it will go right through and fall to the ground or much worse into the engine bay, and those little hex screws are hard to find. |
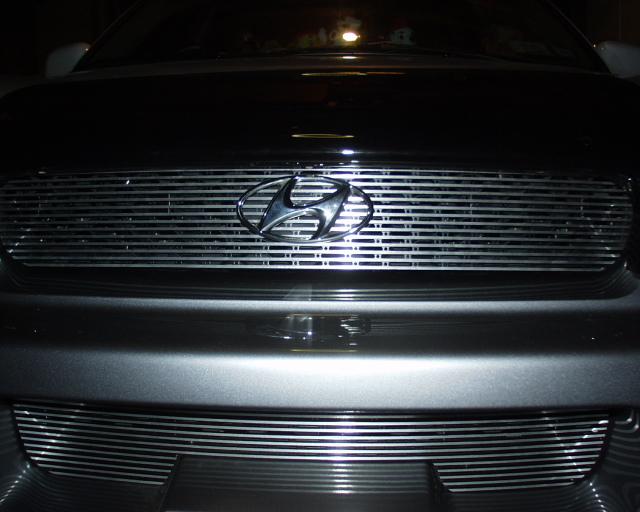
| Pic 06- Side view of Top level Grille showing Hyundai logo 1/4 of an inch before grille. | |
 : : |
You can proceed to re-install
the Hyundai "H" logo emblem back onto the newly installed Billet Grille if
you like. Some owners chose not to, but I did. You have two options in
putting back the emblem. Either you can cut or trim down about a quarter of
an inch of the pegs in the back of the emblem to have it flush with the
grille or you can leave it as it. I chose to leave it as is for fear of
totally destroying it. Regardless you will need to replace the stock screws and find longer ones being that the new grille increases the depth the screw need to go through. Once you replace the emblem (and if you did not trim down the pegs) it will be suspended about a quarter of an inch before the grille. To me this gives it the unique look of being almost suspended in air just before the grille. |
Installation of the Billet Grille - Bottom Level
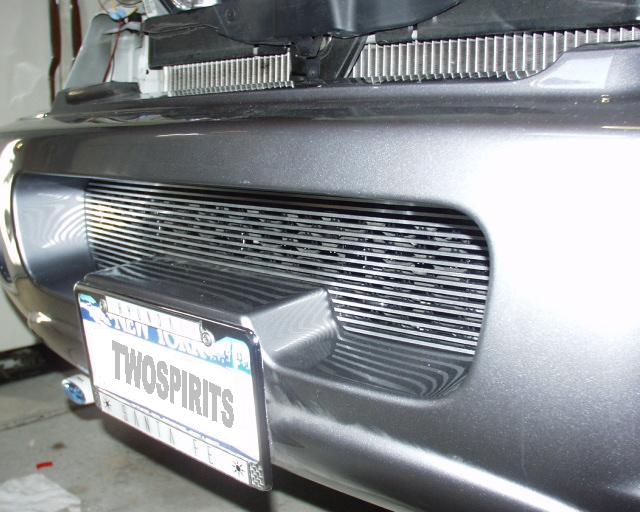
| Pic 07- Bolts underneath the bumper. | |
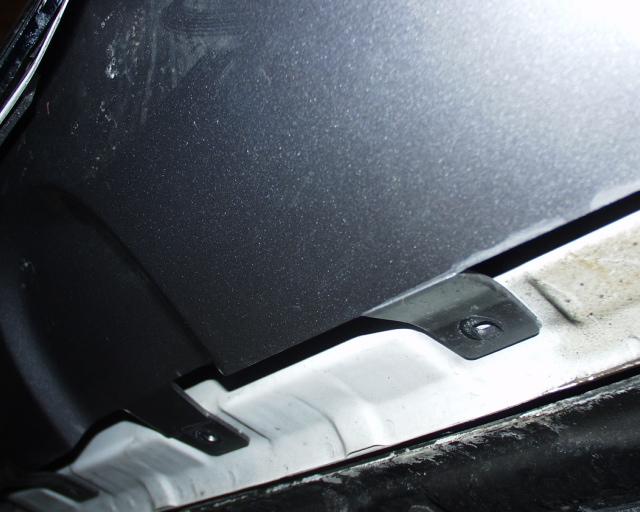 |
With the top level done, we now focus on doing the lower level. This part is the most strenuous and you will need to have patience in order to complete it. It seems that Hyundai in their infinite wisdom did not leave that much space to have a normal human hand much less arm to be able to go in the back section of the lower grille. Upon trying numerous ways of getting in there, (some suggested to remove the bumper completely), I found out that by going in from underneath (on suggestion by fellow member Freval) of the bumper was the best way to install the lower section of the new grille. As you can see in pic # 7 you will need to remove the 5 bolts (using a ratchet wrench. In doing so it allows you to maneuver the bumper (since its soft plastic anyway) just enough to fit your hand and arm into the area behind the stock grille. |
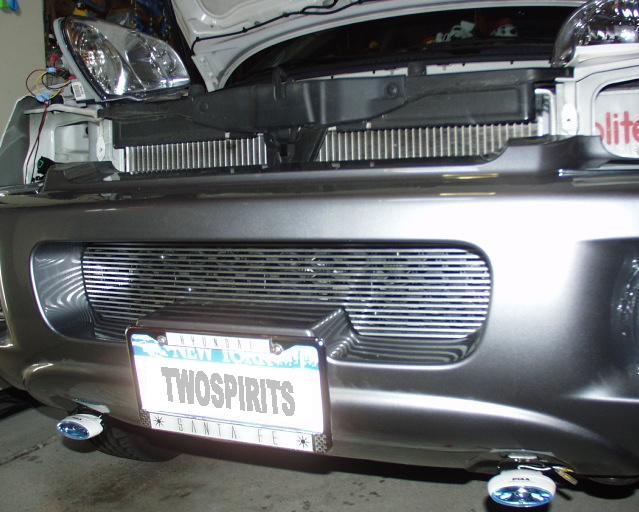
| Pic 08- Opening behind the grille from underneath the bumper | |
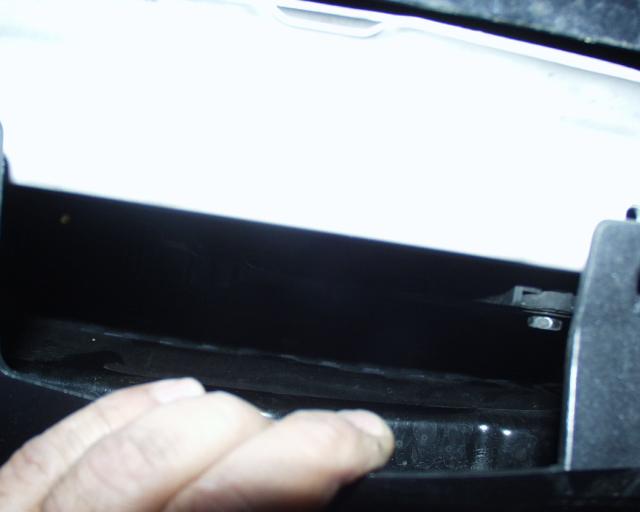 |
At this point you will take
the lower Billet Grille and place it on top of the stock one to see where
you will thread the tie straps. Note: try not to place the tie straps too far left cause your hand will never reach it. At this point take the grease marker and mark where you want the ties straps to hold the new grille. Now take the grille off and using the tie straps fish them through the grille from behind. After all 4 ties are on the new grille, place the new grille carefully (without losing or unthreading the tie straps) onto the stock one. At this point the tie straps should have gone through the honeycomb stock grille. |
| Pic 09- | |
 |
Carefully move the
bumper a bit out of the way and insert your hand into the opening you
widened and feel your way to the first tie strap and try to thread one end
to the other. (This may take quite some time, so be patient and be careful
there's not much room back there and if your arm is a bit bigger than most
then you will get scratches.) Once you are done connecting the ties, try to
pull on them so that it tightens. Take a 5 minute break, trust me you'll need it. Come back and with a wire cutter (the smallest you can find) or a utility knife, go back in from underneath and try to cut the remaining length of straps. (This also will take some time, and practice, take more breaks if need be). |
| Pic 10- | |
: |
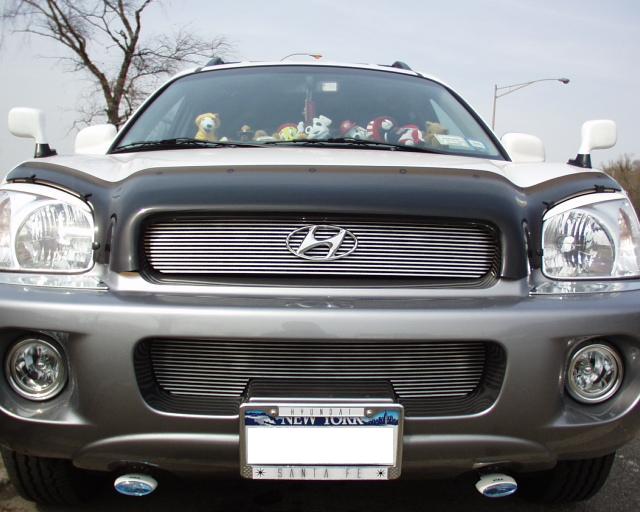
Finally the lower grille should be on, step back and admire the new look. See pics # 9,10 and 11. |
Enjoy your new grille.
| Final pics |
 |
|
This site was last updated 06/10/05